Recycled Paper Bookmark
how a simple sheet turned into something more

In one of my earlier posts, I showed how I made paper from ground-up newspapers. It was one of those projects you start out of curiosity and finish with the satisfaction of turning “nothing” into something quite aesthetic. The paper just sat there – not because it was useless, but because it was clearly waiting for its moment. Raw, soft grey, full of texture – there was something about it that made me keep it close.
From an idea – to something practical
Recently, while reading, I slipped a random piece of paper into my book and thought: I can just make a bookmark. From that paper. The idea was simple – combine something beautiful with something useful.
That handmade paper was made only with water and old newspapers. No glue, no additives. It worked well as a decorative touch – for collages, name cards, or other small styling elements. But as a bookmark? Not really. It was too fragile, too dry to the touch. If I were to make paper specifically for this kind of project, I would definitely add some PVA glue during the pulp-making stage – to bind everything better and give it some flexibility.
The fix: layers of PVA glue
Since the paper was already made, I had to find another way. I ended up covering it with around four layers of PVA glue – both sides. That step changed everything. The texture remained, but the paper became much more elastic. You can gently bend it now, which makes the bookmark sit better between pages and generally improves its durability.
The detail that makes it work
To finish, I added some gold flakes. Not too many – just enough to catch the light and give the piece a bit of character. I like when things feel understated but have that one unexpected detail. And that’s what this bookmark is – simple, but unlike anything I’ve made before.
Technically, the bookmark could be longer – something more traditional. But this was a small experiment, and in its current form, it honestly meets all my expectations. It has its own charm, fits nicely inside a book, and does exactly what I wanted it to do.
Step 1 – preparing the paper and cutting the shape
First, you’ll need the paper – at the top of this post, I’ve linked a full tutorial where I show how to make a sheet like this from old newspapers and water. If you’re planning to use it for a bookmark from the start, I recommend adding a bit of PVA glue during the pulp-making stage. It helps make the paper more durable and slightly flexible.
Once the paper is completely dry, cut out a narrow strip. Mine is 5 cm wide – you can check standard bookmark sizes online or just compare it with one you already have. As I mentioned earlier, I would probably make it a bit longer next time, but for this small experiment, it worked just fine.

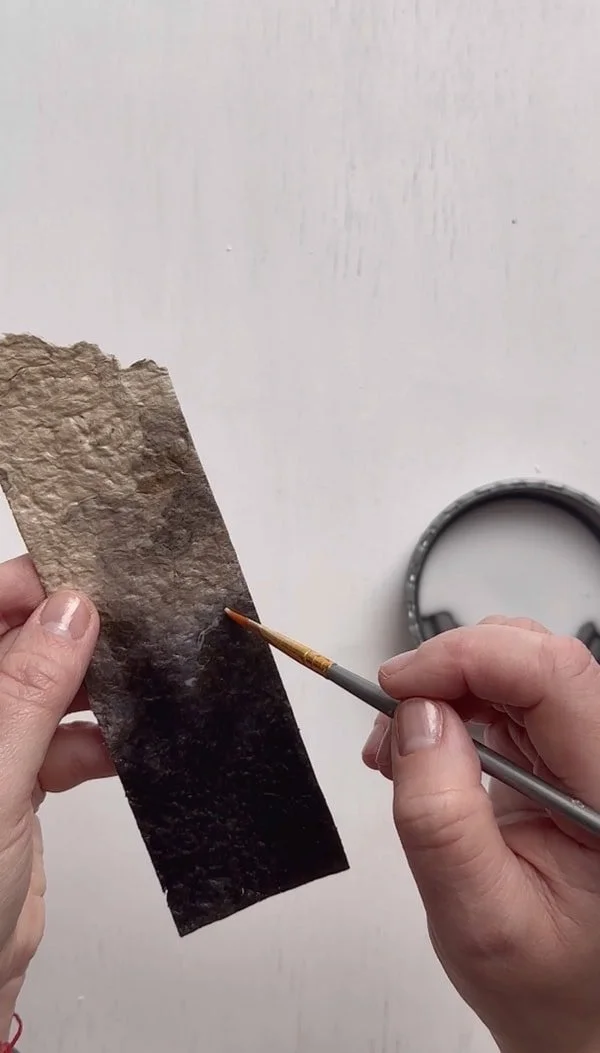
Step 2 – applying layers of PVA glue
The next step is applying extra layers of PVA glue. I started with paper that didn’t have any additives, so I’m not exactly sure how many coats it takes in general – in my case, it was about 4 layers.
If you’ve already added some PVA glue during the paper-making stage, I think 2 layers should be enough. But honestly, the best way is to just test it.
Apply each layer one at a time – spread the first one, let the glue soak in and dry completely before adding the next.
Once dry, the paper strip should feel slightly elastic and springy, without tearing or cracking when handled (though let’s be real – if you fold it in half, it’s going to snap ;).


Step 3 – prepping for the gold accents
On the dry paper, apply small dots or strokes of PVA glue wherever you want the gold accents to appear. It doesn’t have to be precise – actually, a more irregular pattern will give a more natural, organic look.
Step 4 – applying gold flakes
Now it’s time to add the gold flakes (or silver, or any other kind – whatever you have and like). I’ve had a small container of gold flakes for probably 10 years – bought it ages ago and only recently started using it for little details.
Sometimes, a small shiny accent can nicely break up the grey tones and raw texture – it adds just enough light.
Use a stick, tweezers, or even your finger – whatever feels comfortable – and apply the gold flakes to the areas where you previously added glue. Press them down firmly and leave the piece to dry completely.


Step 5 – brushing off the excess gold
Once the glue is completely dry and the gold flakes are well stuck, it’s time to clean up the surface. Use a brush with fairly stiff bristles – make quick, slightly scratchy (but still gentle) movements to remove the excess flakes.
On the areas where you applied glue earlier, the gold should stay beautifully in place – untouched and shining just as it should.

And that’s pretty much it :-)
The bookmark is done – simple, but full of character. If you’ve got some leftover paper and a bit of gold (even from ten years ago), it’s definitely worth giving it a try.