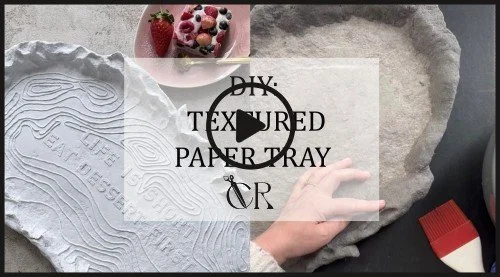
From Shelf to Surface: Completing a Paper Tray Study

This tray was made quite some time ago — and for a long while… it simply sat on a shelf. Waiting for an idea. Waiting for its moment. Waiting for the right kind of energy.
At one point, I even started telling myself that maybe I had abandoned it. That maybe I just couldn’t bring myself to finish it. You know that feeling — when a project is almost done, but you’re missing that one final decision that allows you to close it properly?
In 2026, I decided to change that. I want this year to be about finishing old projects — the ones that have been sitting in the “almost done” category for far too long. This tray became the perfect excuse to return to the process without pressure and treat it as an experimental ground rather than a final, polished object.
If you haven’t seen Part 1 yet — where I show how to build the base of the tray from scratch — make sure to read it first:
https://www.cozyrawness.com/diy-tutorials/easy-paper-tray
That’s where the story of this form begins, and where I walk you step by step through building the structure, layer by layer, until it’s ready for further experimentation.
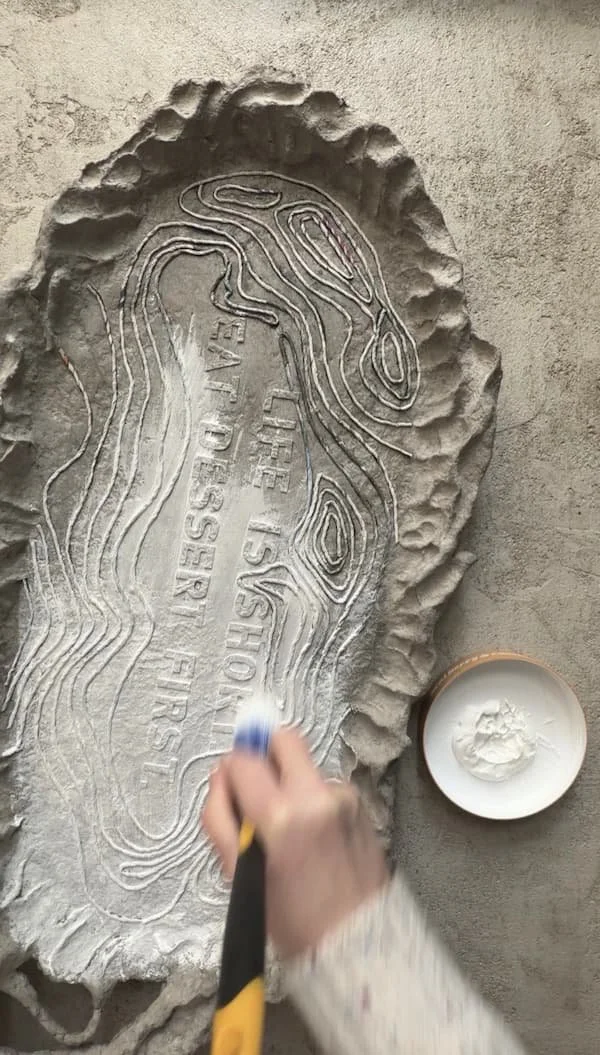
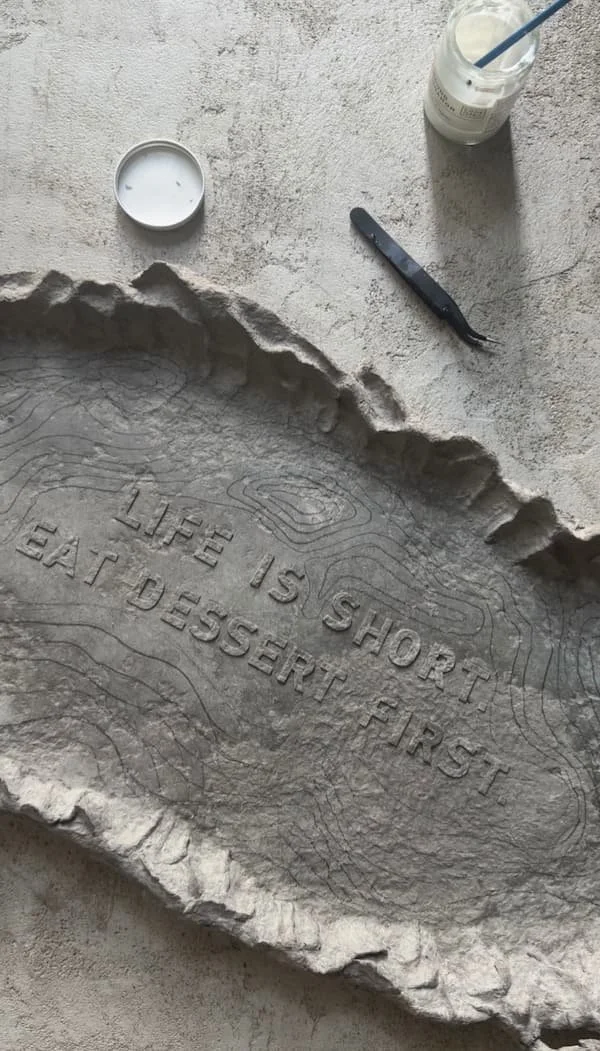
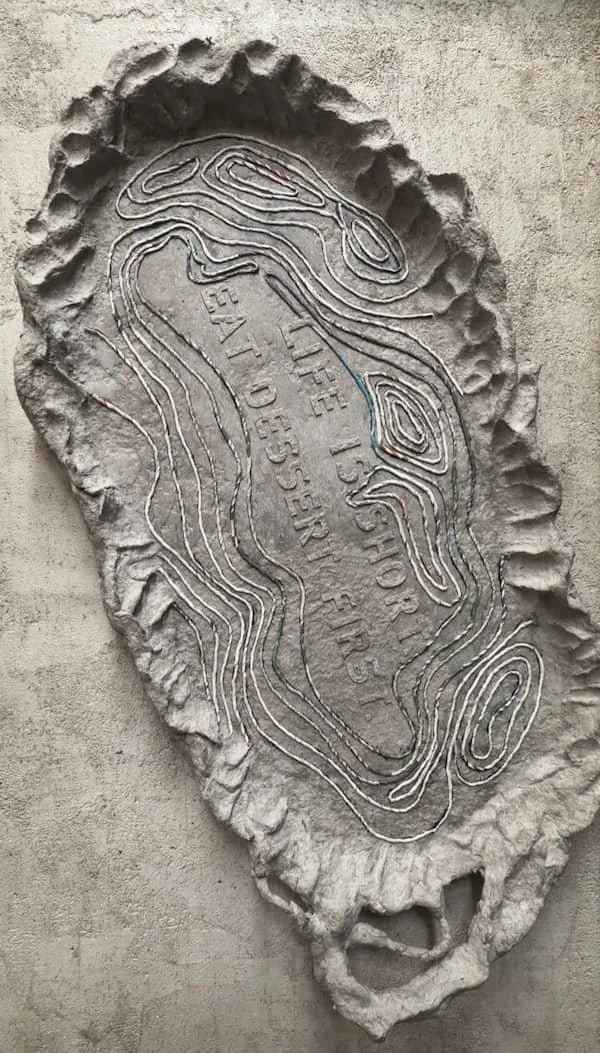
In this second part, we move on to decorating and finishing the tray. I tested several new ideas — from sculpting the edges into a more organic shape, to attaching a playful quote in the centre (you can see the lettering project here:
https://www.cozyrawness.com/diy-tutorials/diy-concrete-look-letters
and creating decorative lines made entirely from paper.
Because paper isn’t just paper pulp. Paper itself can become a structural material — folded, rolled, twisted, shaped into cords or small forms that create texture and rhythm. That’s what fascinates me most in this process: everything stays within one material, but the way it’s treated completely changes its character.
I treated this tray as a space for testing. I explored how far I could push the organic shaping of the edges. I observed how paper cords behave once glued and dried. I tested whether the letters would feel like decoration — or become part of the surface itself.
At the finishing stage, functionality was equally important. Even if the piece has a sculptural quality, it still needs to remain usable. I checked whether the surface was flat enough for cups and plates to sit steadily, making sure no decorative element was too raised. If necessary, I gently sanded down selected areas — not to erase the character, but to restore balance.
The final step was painting. I chose white — not to hide the texture, but to emphasise it. I applied three thin coats, allowing each layer to dry completely. A larger brush worked best for covering the main surfaces, while a smaller one helped me reach into the grooves and around the lettering.
If you’d like to see the full process in detail, I invite you to watch the YouTube video. It’s quite long, but that allows me to show every step without shortcuts — including moments of hesitation, adjustments, and how the material truly behaves. Even though I always try to describe everything thoroughly here on the blog, some things are simply easier to understand when you can see them happening in real time.
Sometimes a project needs time. Sometimes it needs to sit quietly on a shelf before it’s ready to be finished. And sometimes, all it takes is a decision to finally bring it to completion.
You will need:
old newspapers to make paper cords
binder clips
a pencil to mark the position of the letters on the tray
scissors
a fine liner or marker to draw guide lines on the tray
a knife with a rounded tip for smoothing the surface
tools with different tips to create decorative edges (I used various kitchen tools)
brushes:
a small one for PVA glue and painting details
a larger one for painting the entire surface
a mini rotary tool for making holes in the tray and smoothing small elements
wire for the tray handle base
thin wire
sandpaper (optional)
paint
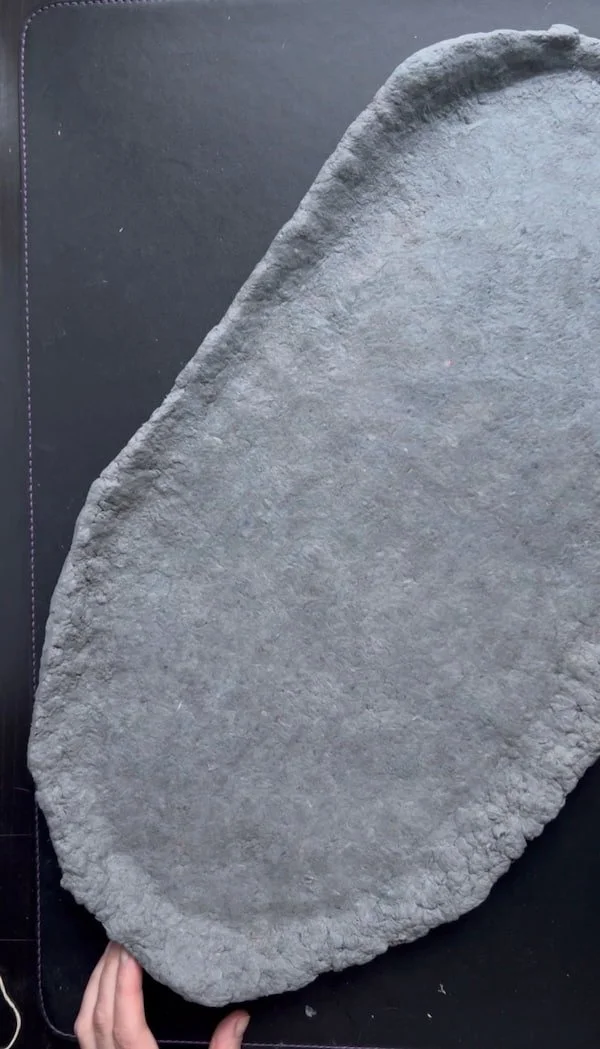
Step 1: Shaping the Edges
Once the base of your tray has partially dried, you can begin shaping the edges.
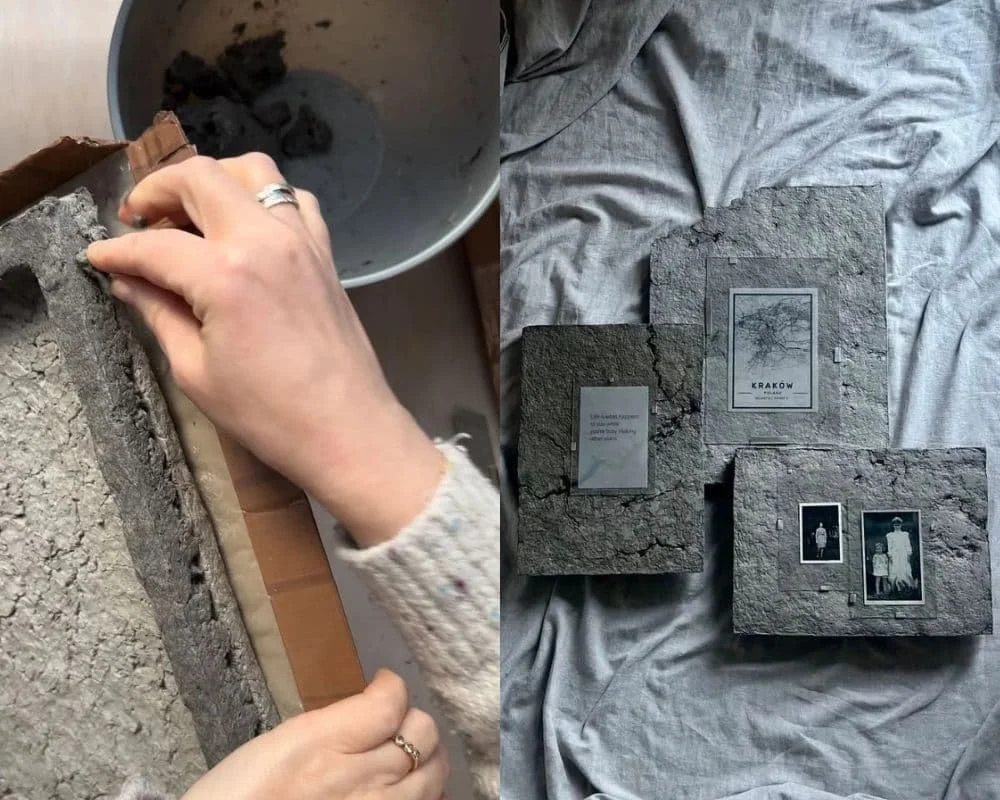
To create organic, sculptural forms, we need to build up the rim of the tray by adding more paper pulp. Instead of working around the entire edge at once, I recommend shaping it in sections. This process takes time, and if you need to step away, the pulp may start drying before you’ve finished forming it. Working in smaller areas gives you better control over the texture and shape.
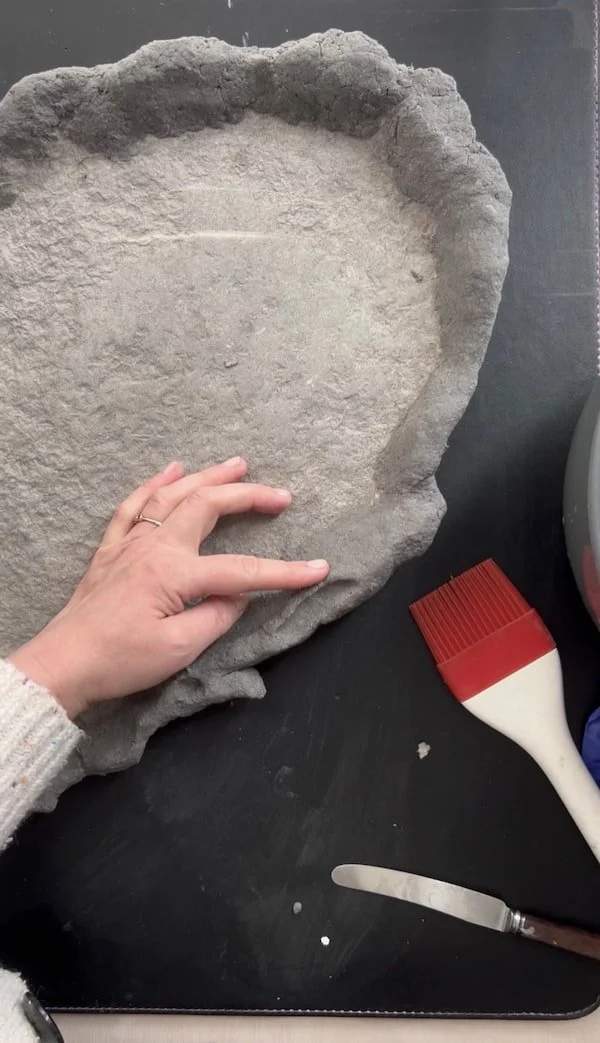
Apply a layer of paper pulp along a selected section of the rim. Allow it to sit for a short moment until it becomes slightly firmer and easier to manipulate. Once the pulp is no longer overly wet but still flexible, you can begin shaping it.
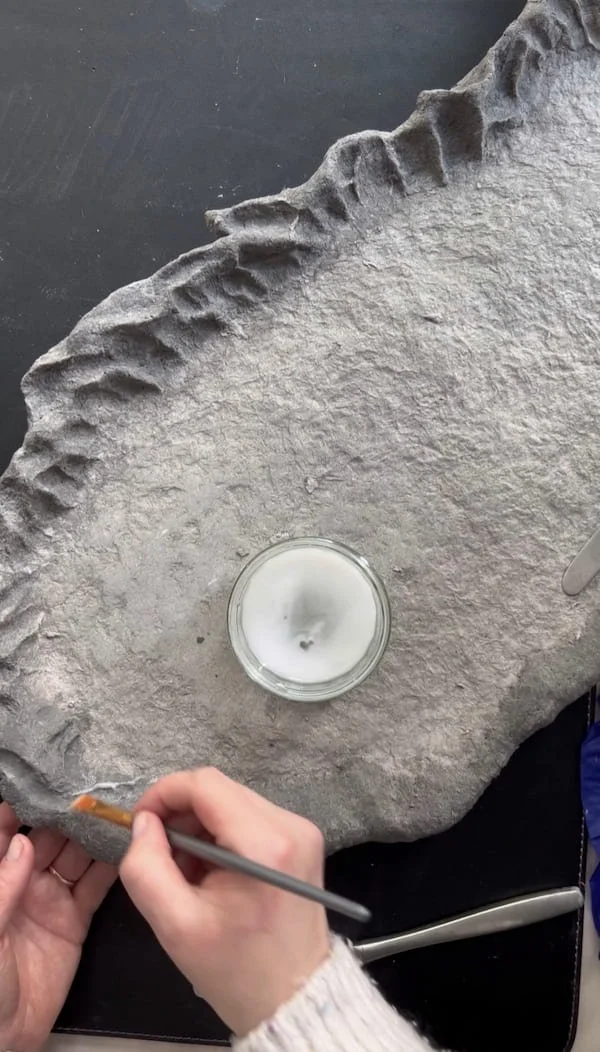
Using a simple kitchen tool — or even the back of a spoon — gently press, lift, and sculpt the surface to create soft, organic curves. Don’t aim for symmetry. Irregularity is what gives the tray its character and movement.
Once you are satisfied with the shape, leave the entire piece to dry completely before moving on to the next step. Proper drying is essential to ensure the structure remains stable and strong.

Step 2: Attaching and Building the Handle
For this tray, I decided to add a more extended handle on one side — a form that grows directly out of the object itself. I wanted to introduce a new structural element and, at the same time, test how the construction would behave in practice.
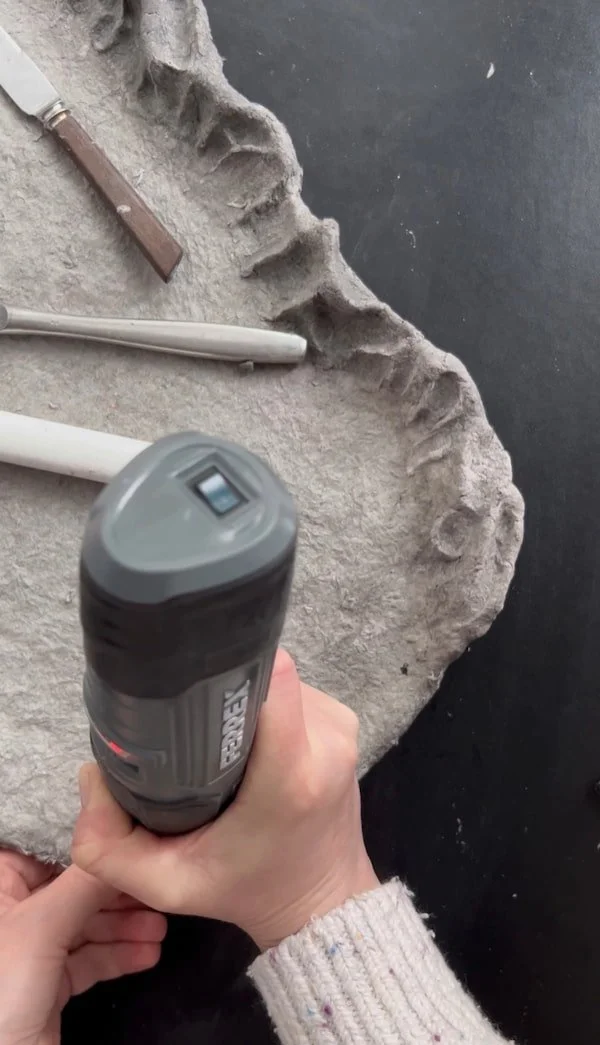
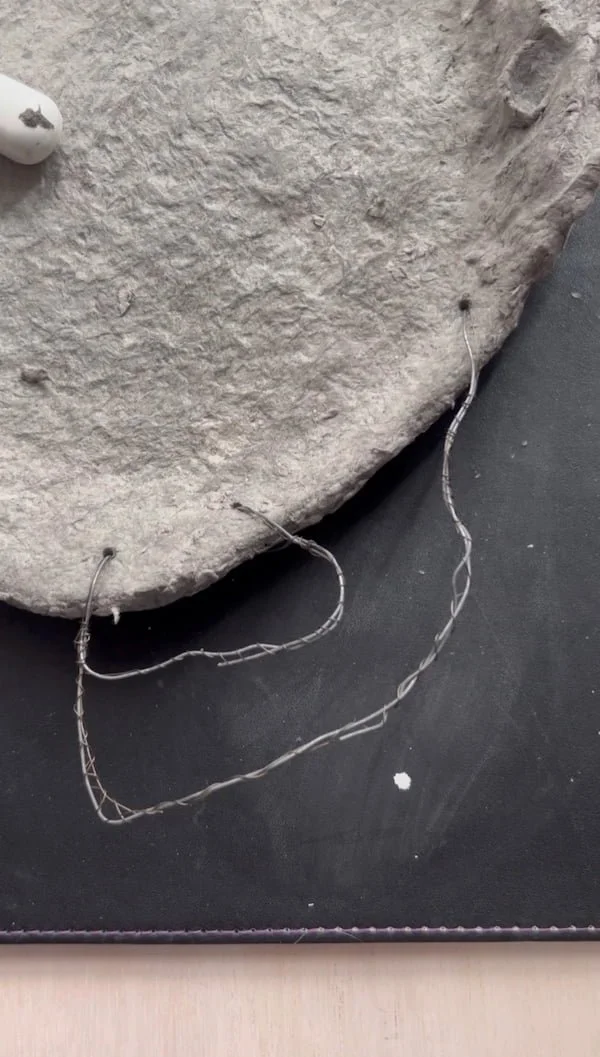
I began by marking the exact points where the handle would emerge from the tray. Using a mini rotary tool, I carefully drilled small holes in the selected area.
Next, I took a thicker, sturdy wire and shaped the base structure of the handle. To help the paper pulp adhere better, I wrapped the main wire with a thinner wire. This creates a textured surface that allows the pulp to grip and hold more securely.
Once the structure was ready, I applied the first layer of paper pulp.
Don’t worry if you’re unable to cover the entire wire in one go. The pulp may slide off or detach at first — that’s completely normal. If that happens, simply work in sections. Apply a small amount, allow it to dry slightly until it becomes firmer, and then continue building the form gradually.
This creates the base layer of the handle.
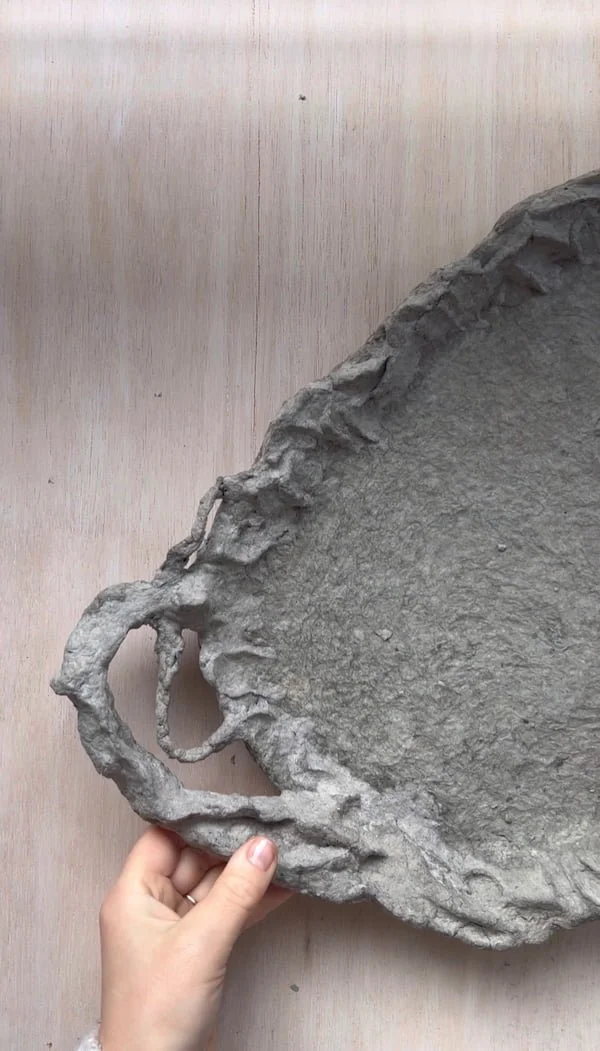
After it has partially set, apply a thicker layer of pulp and begin shaping it in the same way you shaped the edges of the tray — pressing and sculpting the surface to create organic, cohesive forms.
Once you are satisfied with the shape, leave the entire piece to dry completely before proceeding to the next stage.

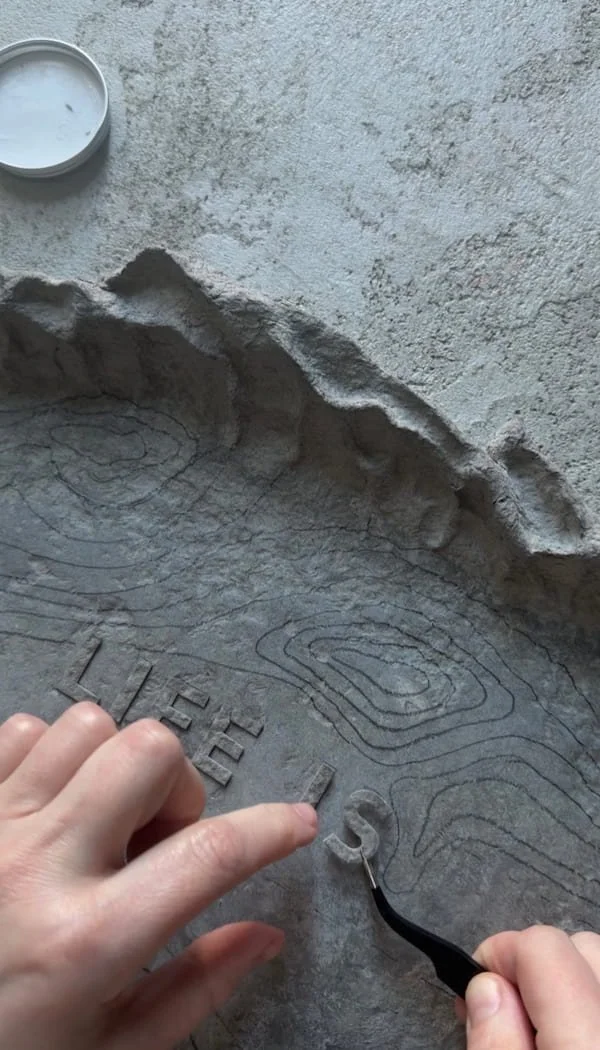
Step 3: Creating and Attaching the Lettering
To create the lettering, I first printed the quote on regular paper. Before printing, I tested different font sizes to make sure the letters would fit the tray proportionally.
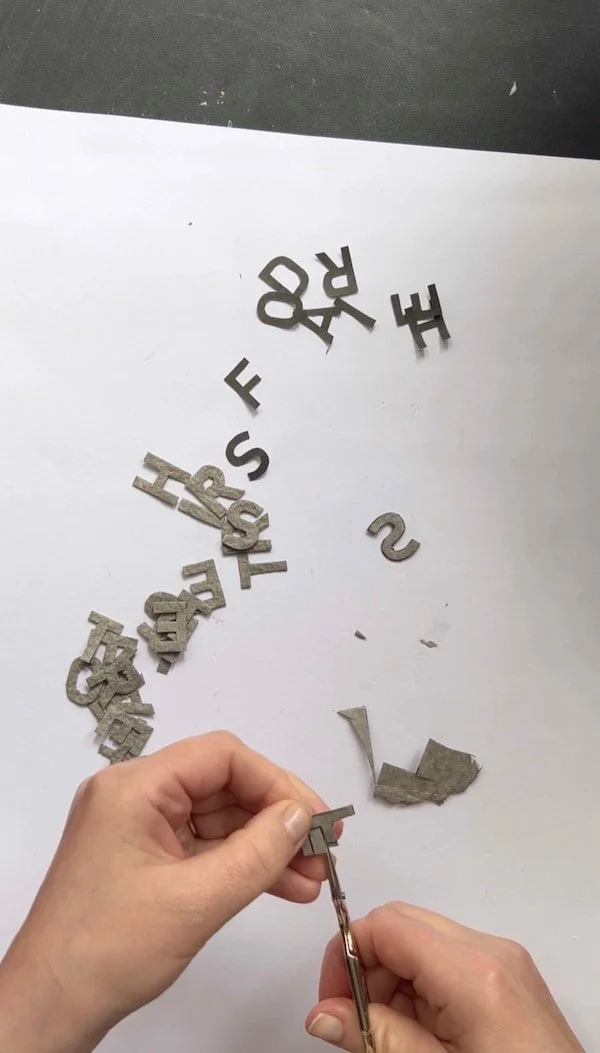
Once I was happy with the size, I carefully cut out each letter from the paper.
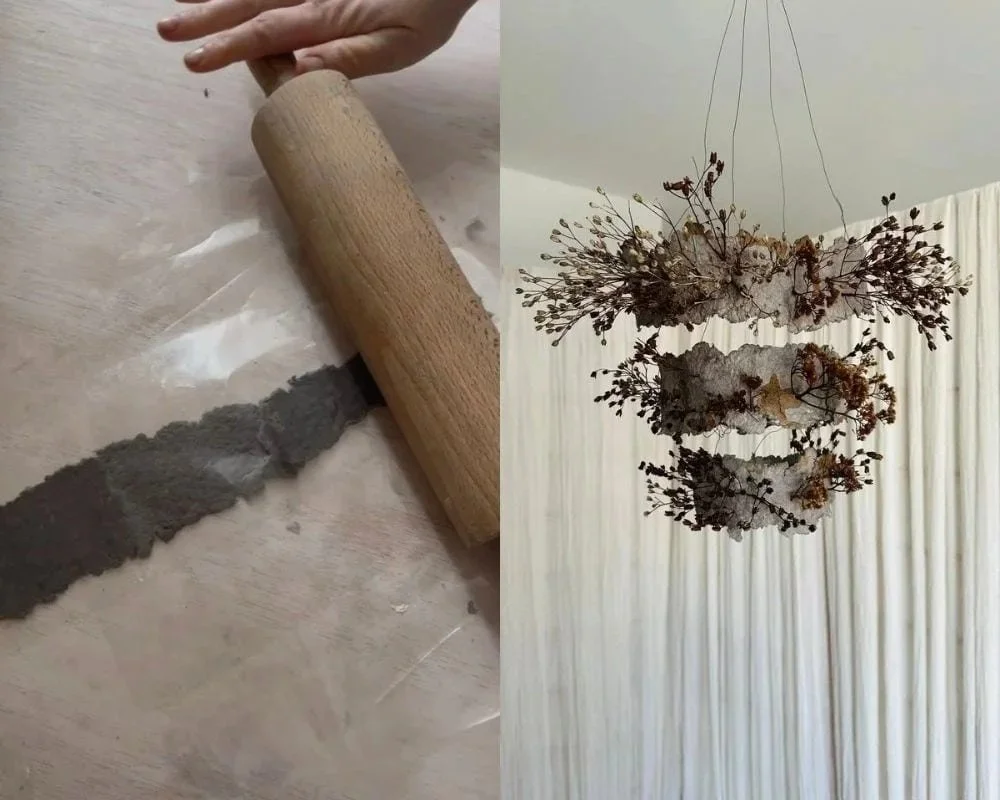
In the meantime, I rolled out a thin sheet of paper pulp. After shaping it into a flat layer, I left it to dry.
A small tip: when drying very thin sheets of paper pulp, they will most likely curl and bend in different directions. To prevent this, I recommend drying them between pieces of fabric and plastic foil, pressed down with several books. Make sure to protect the books and your working surface so they don’t absorb moisture from the pulp.
Once the sheet was completely dry, I traced the paper letters onto the surface of the dried pulp and carefully cut them out.
It’s important to trace the letters in reverse. This way, if you use a pen, the markings will remain on the back side and won’t be visible on the front.
If the letters are not perfectly shaped after cutting, you can gently sand the edges to refine them. Sandpaper works well, but even a simple nail file is perfectly fine for this step.
Before gluing the letters permanently, I recommend placing them on the tray to test the composition. Once you’re satisfied with their position, lightly mark the top edge of each letter with a pencil. This will guide you during the gluing process and help keep everything aligned.
Using a brush and PVA glue, carefully attach each letter and press it down firmly. The glue sets quite quickly, so make sure you position them correctly before pressing them into place.
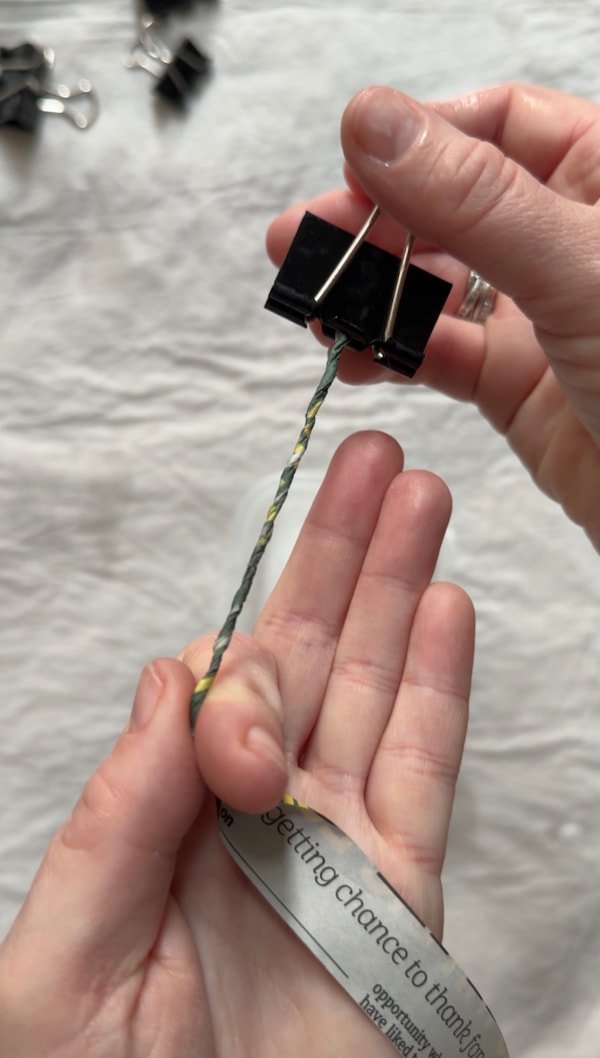
Step 4: Creating Paper Cords (Paper Twisting Technique)
In this step, I used a simple paper twisting technique to transform ordinary newspaper into structural cords. Instead of grinding the paper into pulp, I worked directly with the sheet itself — rolling and twisting it to create a completely different texture and structural element.
I began by unfolding a newspaper and removing any metal staples. Then I cut the longer edge into strips approximately 1.5 cm wide.
Next came the twisting process. I tightly rolled each strip and then continued twisting it to form a compact cord. This movement is much easier to understand when you see it in the video, as the tension in your hands plays an important role in shaping the final result.
To make the process easier, I used small binder clips. I secured one end of the strip with a clip, which gave me better grip and control while twisting the rest of the paper.
Before twisting each strip, I applied a very thin layer of PVA glue.
And I truly mean very thin.
The purpose of the glue at this stage is to bond the layers of paper together, so the strip holds its twisted shape. If the strip becomes too wet, it will tear apart while twisting. The key is to apply just enough glue to bind the paper — not to soak it.
Once the strip was fully twisted, I lightly coated the entire cord with PVA glue using my fingers. This seals the structure and helps the cord maintain its shape. I then left the cords to dry completely.
For this project, I made around a dozen cords.
After drying, I removed the binder clips and trimmed off any loose or untwisted ends.
At this stage, the cords naturally had a rounded cross-section — and they were too high for my design. This was directly connected to the lettering. The cords needed to be the same height as the letters so that cups and plates would sit steadily on the tray. Otherwise, the surface wouldn’t be level enough and the objects placed on it could wobble.
To adjust their height, I flattened each cord using a hammer.
I placed a small piece of flat wood underneath and gently tapped each cord until it reached the desired thickness. The goal wasn’t to crush the structure completely, but to control its height and make it functionally aligned with the letters.
If any section became uneven, I carefully trimmed it with scissors to refine the edges.
After this step, the paper cords were ready to be arranged and attached to the tray.
Step 5: Attaching the Paper Cords
The next step is attaching the paper cords to the tray.
I began by lightly drawing guide lines on the surface of the tray to plan the composition. This helped me control the placement and keep the arrangement intentional rather than random.
Once the lines were marked, I started gluing the paper cords in place.
For more precision, I poured the PVA glue into a small bottle with a thin needle applicator. This made it easier to control the amount of glue and apply it exactly where needed. However, this is not essential equipment — you can absolutely use a thin brush instead, and it will work just as well.
A small but important tip: begin attaching the cords along a straight section rather than on a curve or a wave. The cords will eventually need to be joined, and connecting them on a curved section can be much more difficult and less precise. Starting on a straight line makes the joining process cleaner and easier to manage.
While working, I initially thought the cords might be difficult to attach — especially along curved lines. However, it turned out to be much easier than expected. Even on gently curved sections, the glue bonded surprisingly quickly.
In most cases, I only needed to hold the cord in place with my fingers for a short moment. Occasionally, I used small tools — like nail files — as temporary weights to keep the cord pressed down while the glue set.
Once all the cords were attached, I left the entire piece to dry completely before moving on to the next stage.
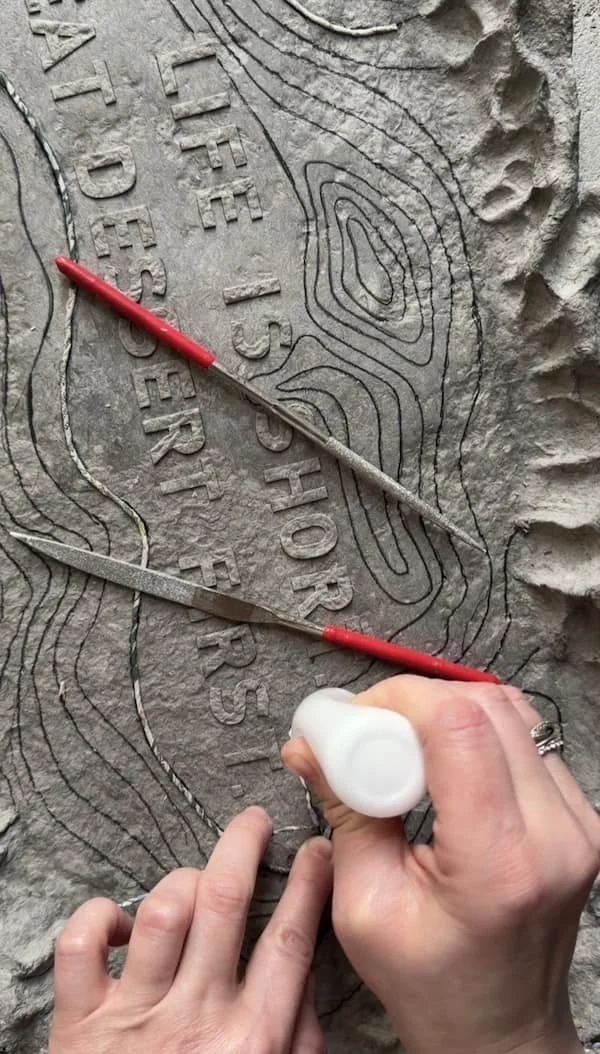
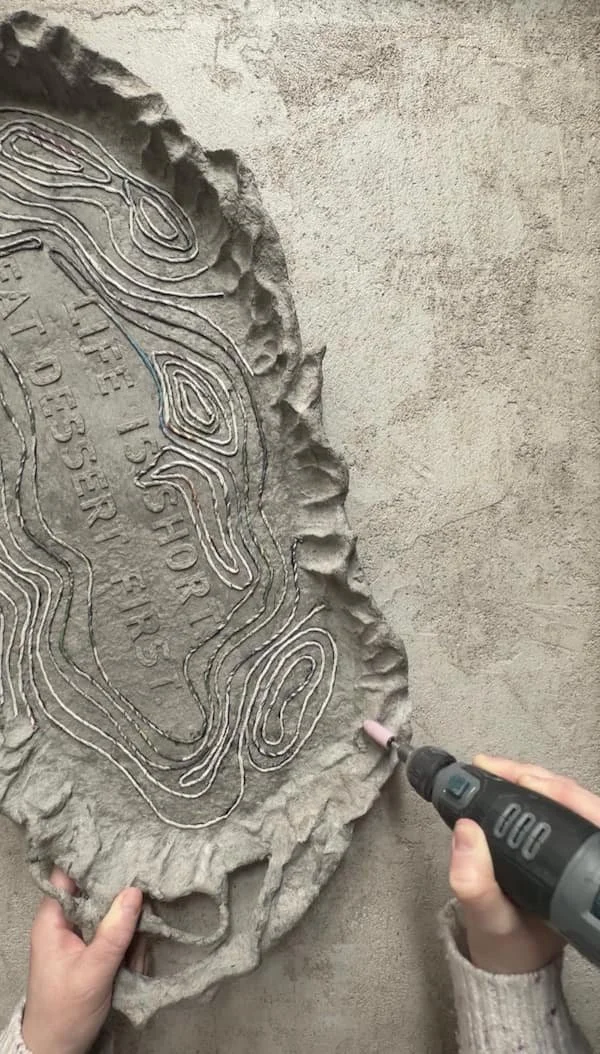
Step 6 (Optional): Smoothing the Surface
At this stage, you may choose to smooth the surface before painting.
If there are any uneven areas or raised elements, you can gently sand them down using sandpaper. This allows you to refine the surface without removing its character.
For more detailed adjustments, you can also use a mini rotary tool. It gives you greater precision and helps reach smaller areas around the lettering or along the edges.
Make sure the tray is completely dry before sanding.
This step is optional, but it can help ensure the tray remains both visually balanced and functional — especially if you want cups and plates to sit steadily on top.
Step 7: Painting
The final step is painting.
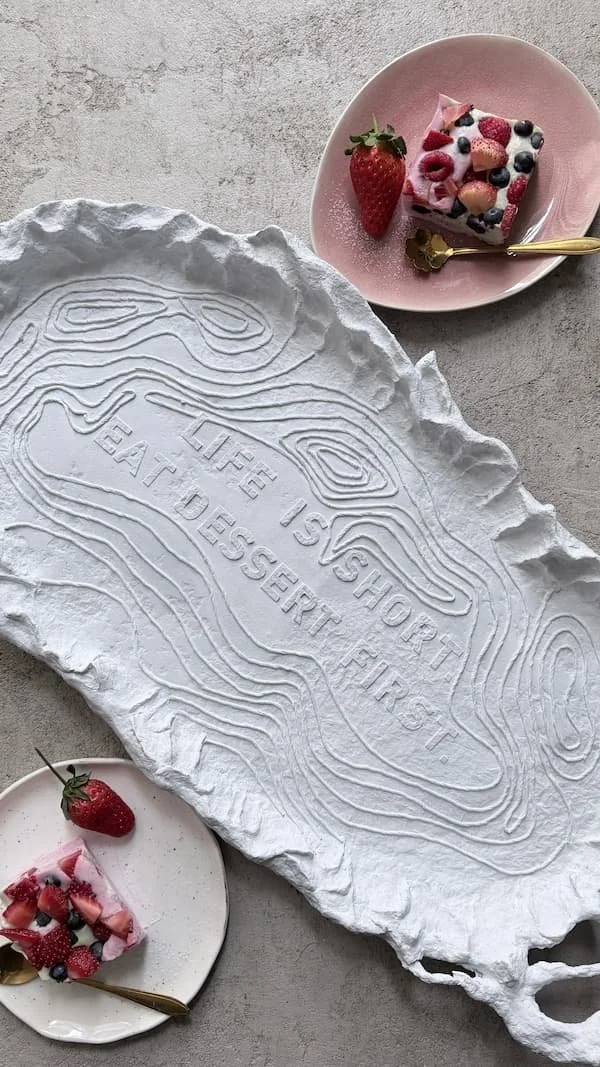
I decided to use white. Rather than hiding the texture, white enhances the shadows and highlights created by the layered paper, making the surface more expressive.
I painted the tray in three separate coats, allowing each layer to dry completely before applying the next. Working in intervals is important — it ensures better coverage and prevents the surface from becoming overly saturated.
For the main areas, I used a large brush to cover the surface efficiently and evenly. For the detailed sections — especially around the paper cords and lettering — I switched to a smaller brush to reach into the grooves and maintain clean edges.
Once the final coat was dry, the tray was complete.