A Layered Paper Vase Technique
This is a project that came back to me after some time.
It returned exactly when I was technically ready to make it.
At first glance, it seems very simple.
After all, it’s just small squares layered on top of each other.
Nothing complicated.
But not quite.
Everything came down to technical details.
A while ago, I started this project by cutting paper pulp into pieces, letting them dry, and then gluing them together. That was the mistake. Dry elements don’t cooperate. They lose flexibility, and the structure becomes difficult to control.
Only through practice and experimentation with paper pulp did I begin to understand how this material actually works. The key to this project is working wet. You don’t wait for the elements to dry. In fact, you don’t let them dry at all. Letting them dry is what causes tension, cracks, and problems with bonding.
It’s a bit like “wet-on-wet” painting — everything happens while the material is still soft and responsive. That is the trick.
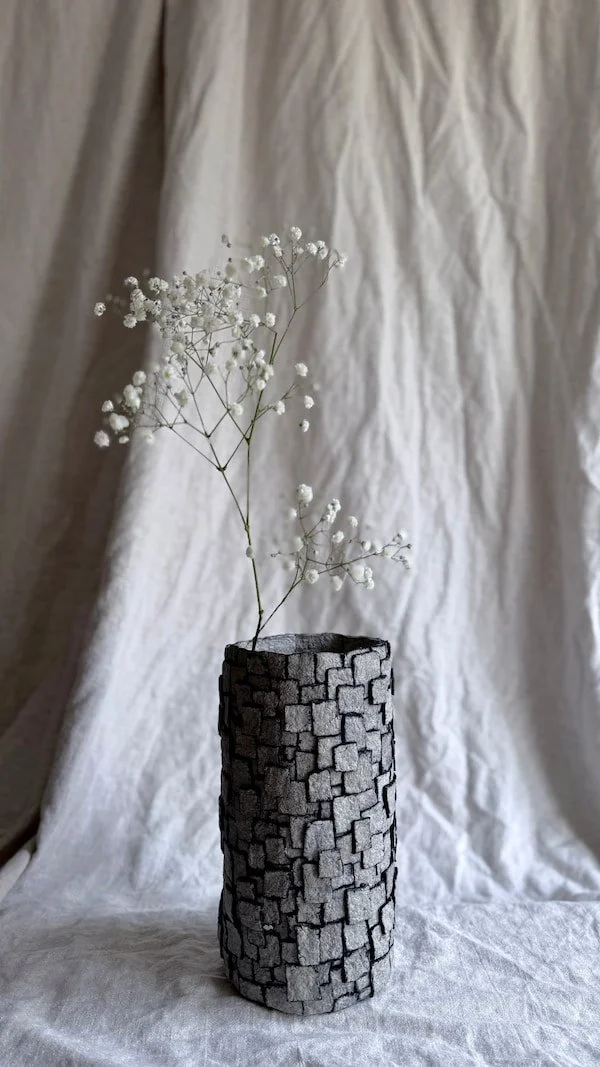
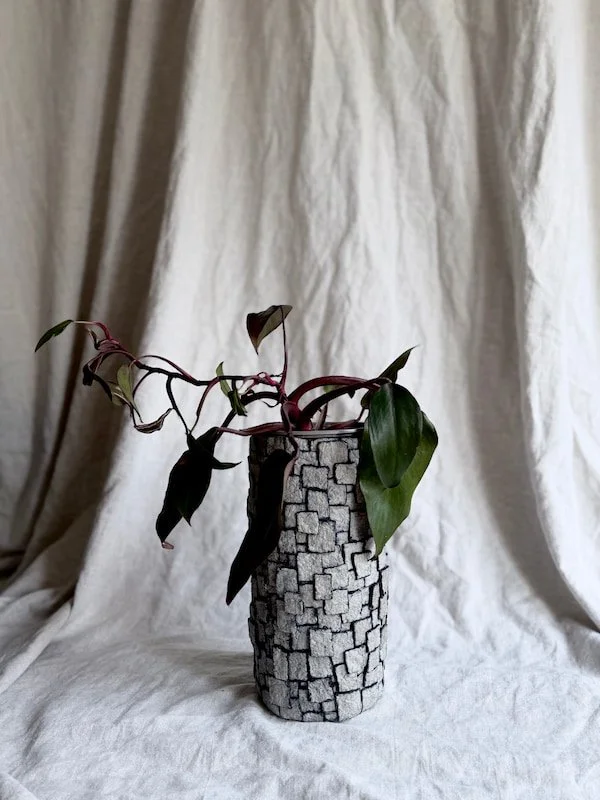
Because I’m especially drawn to functional forms like bowls and vases, I chose to present this technique through a vase cover. You can place a bottle inside and use it for fresh flowers, add dried branches, or use it as a plant pot cover.
Of course, the technique itself can be applied in many different ways. You could create wall decorations, textured panels, relief artworks, frames, candle holders, lantern covers, or even more sculptural three-dimensional objects.
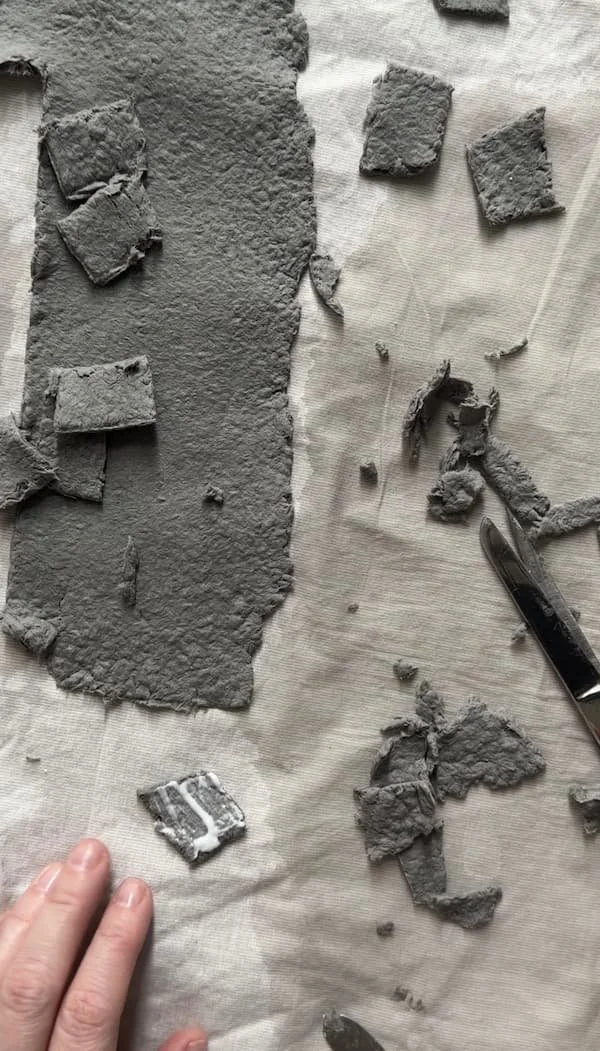
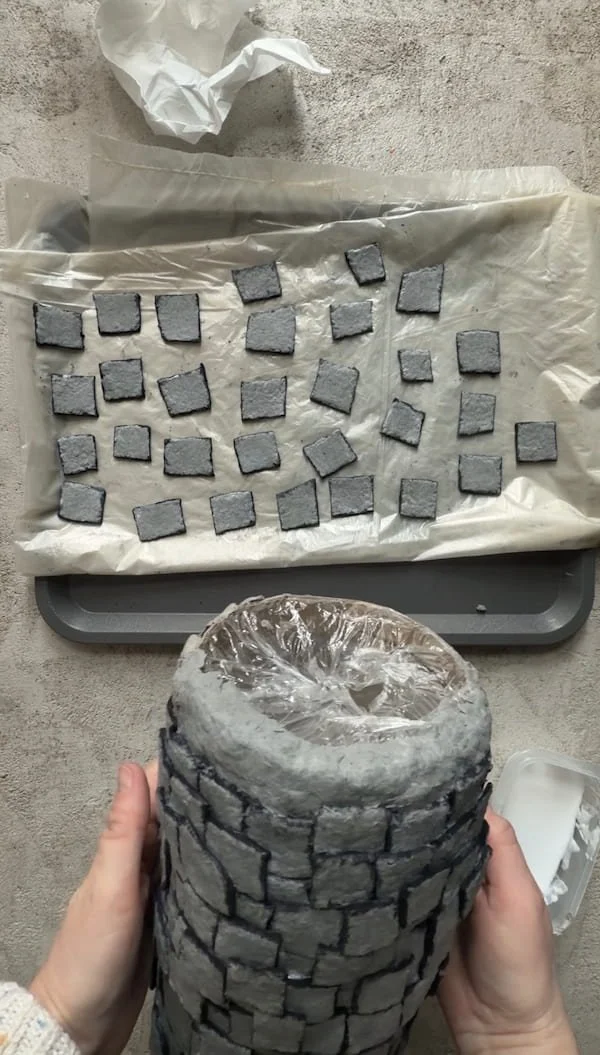
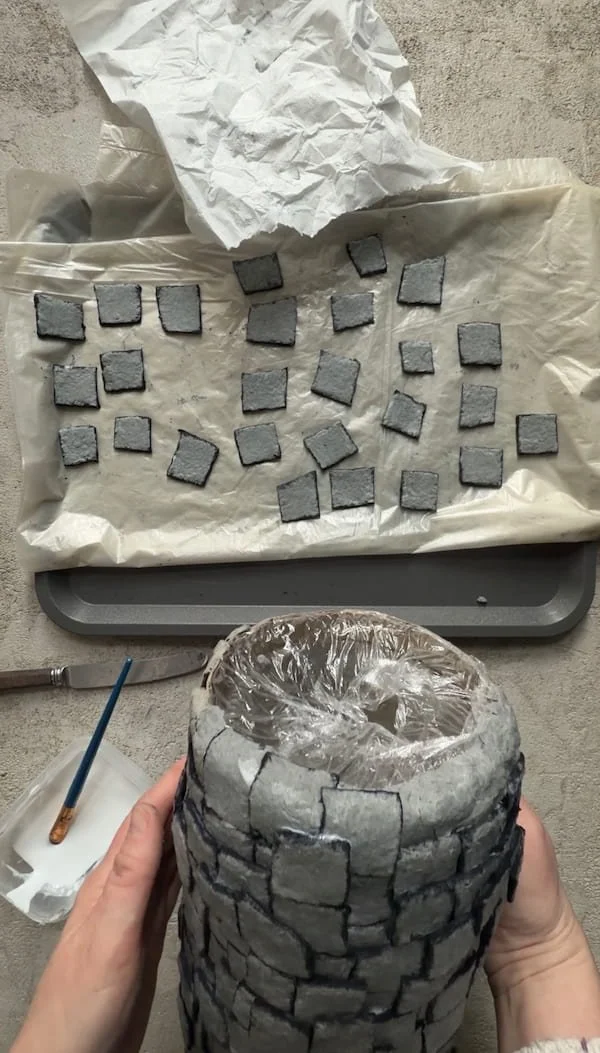
The squares themselves are intentionally imperfect. They are not measured with a ruler. Each one has slightly irregular edges. That subtle irregularity gives the surface a more organic rhythm.
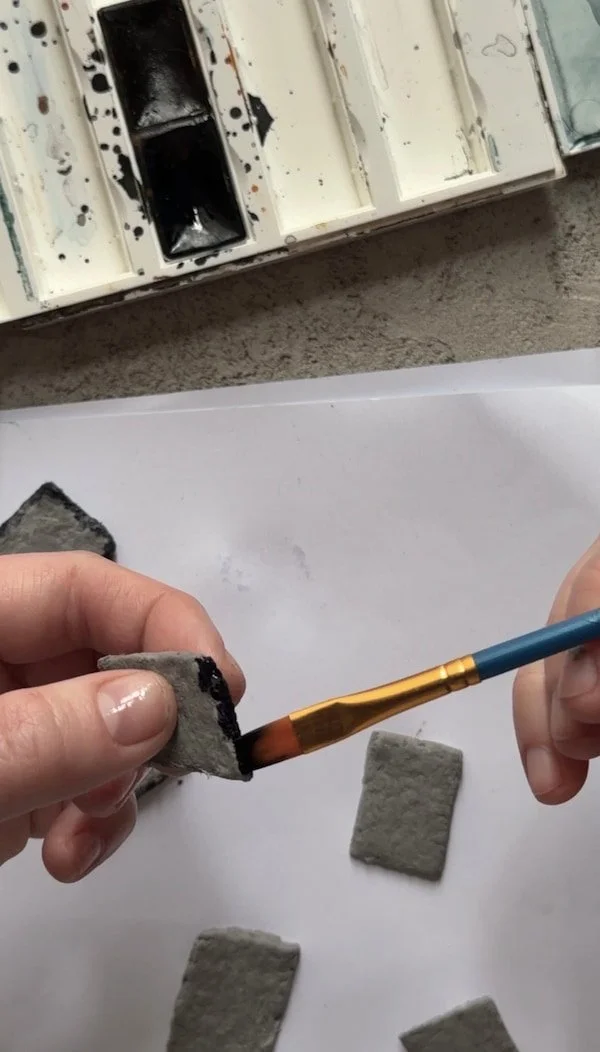
To darken the edges, I used watercolor paint. Wet paper pulls the pigment beautifully, allowing the color to sink into the texture and naturally enhance the depth between the layers.
It is a simple project.
But only once you truly understand the material.
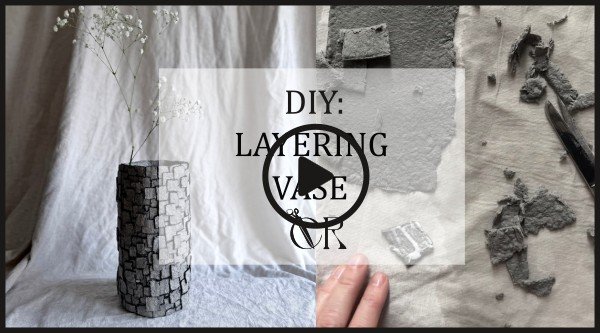
CHECK OUT FULL TUTORIAL:
What You’ll Need:
Paper pulp (you can find the full recipe here – link)
Old fabrics or cloth scraps
A knife
Scissors
PVA glue
A brush
Watercolor paints
Cling film
Plastic sheet (optional, to protect your workspace)
Old cardboard
Adhesive tape
A jar, glass container, or vase to use as a shaping form
Paper towel (for gently pressing and absorbing moisture while attaching the squares)
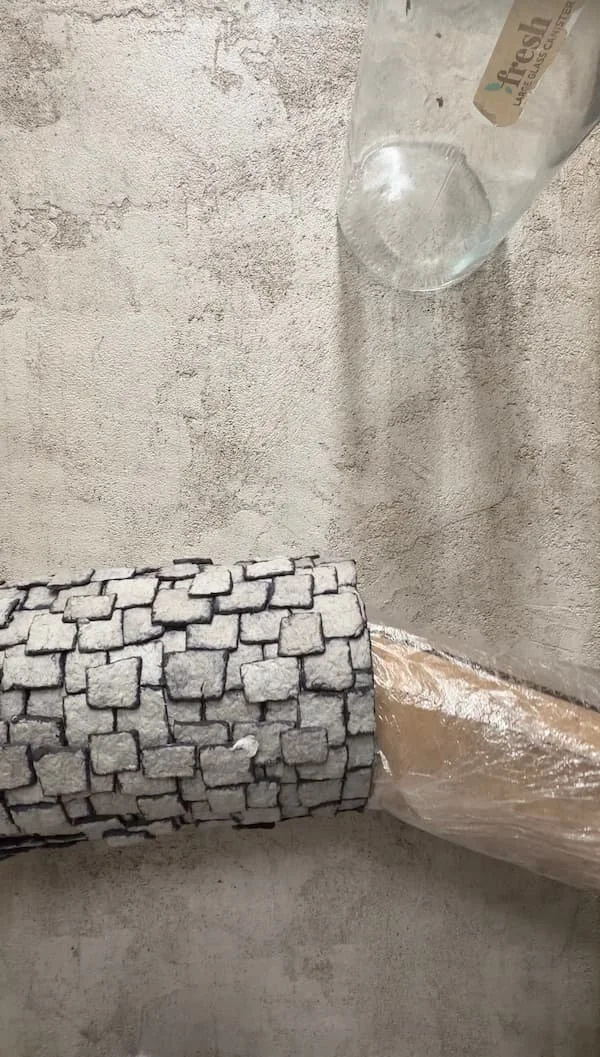
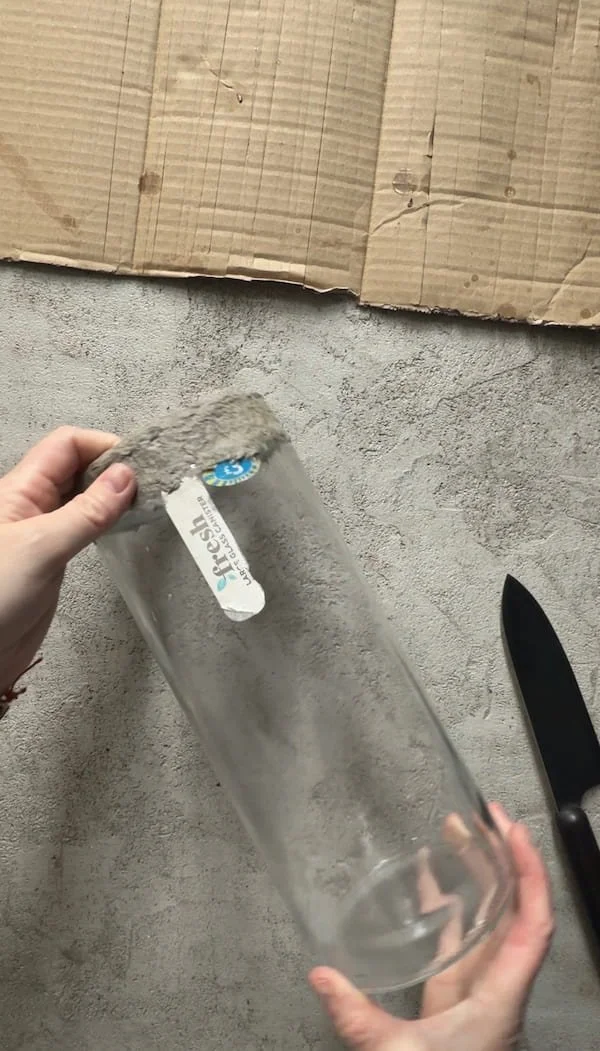
Step 1: Preparing the Form
Start by choosing your base form. This can be a vase, a jar, or any object with a shape that feels right to you.
Some time ago, I found a tall glass container that I slightly adjusted with paper pulp to refine its shape. That became the base for my vase.
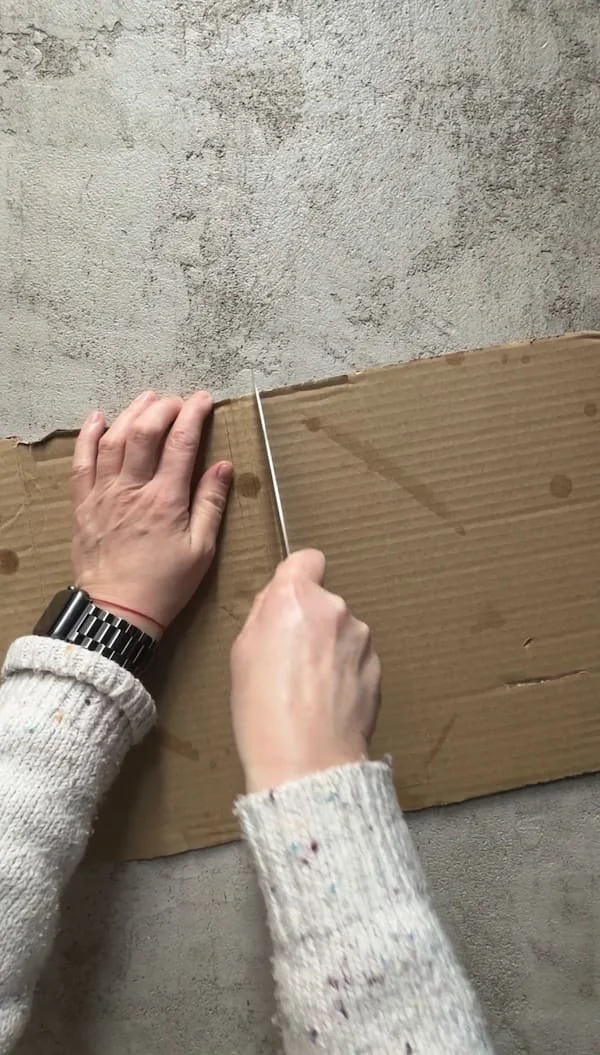
Now we need to make sure we can separate our new paper form from the base later on. For this, it’s best to use old cardboard.
If you begin applying paper pulp directly onto a jar — even if you wrap it in cling film — you may not be able to remove it easily. As the paper dries, it naturally shrinks and tightens around the form. There won’t be enough space to slide it off.
That’s why wrapping the base form with cardboard first is important.
Cut the cardboard so it can gently wrap around the form. I have to admit, I didn’t do this very precisely the first time — but I recommend that you do.
Make small vertical cuts along one edge of the cardboard, spacing them about 0.5–1 cm apart. This will allow it to curve smoothly and sit more neatly around the shape.
Leave a little bit of looseness. This means that once you tape the cardboard edges together, it should still be able to move slightly around the base form. You should be able to slide it up and down without force.
This small gap will make it much easier to remove your finished vase later.
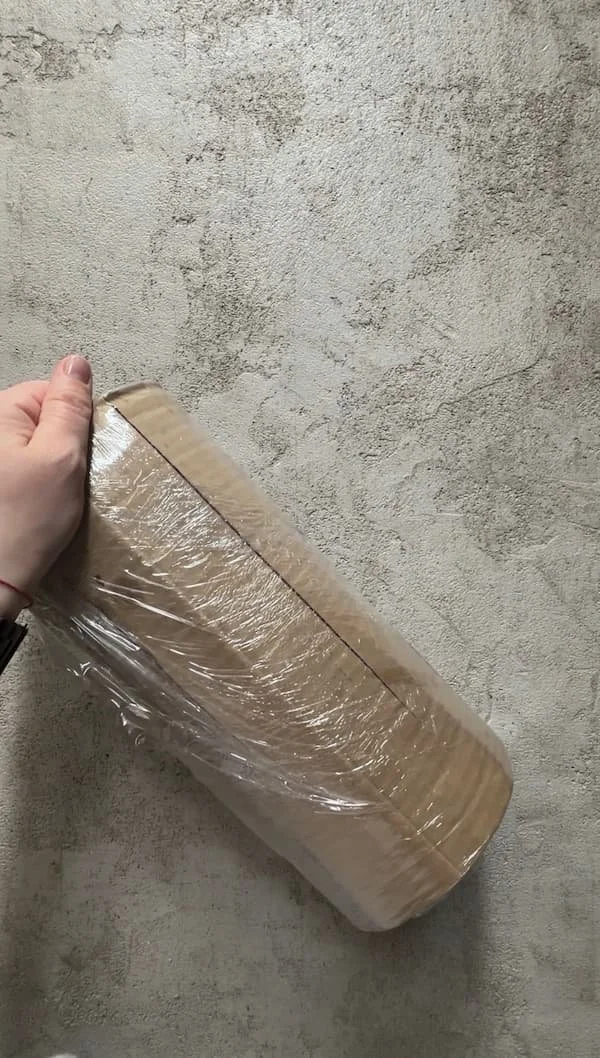
Finally, wrap the cardboard with cling film. This protects the structure from moisture, as the paper pulp releases water while you work.
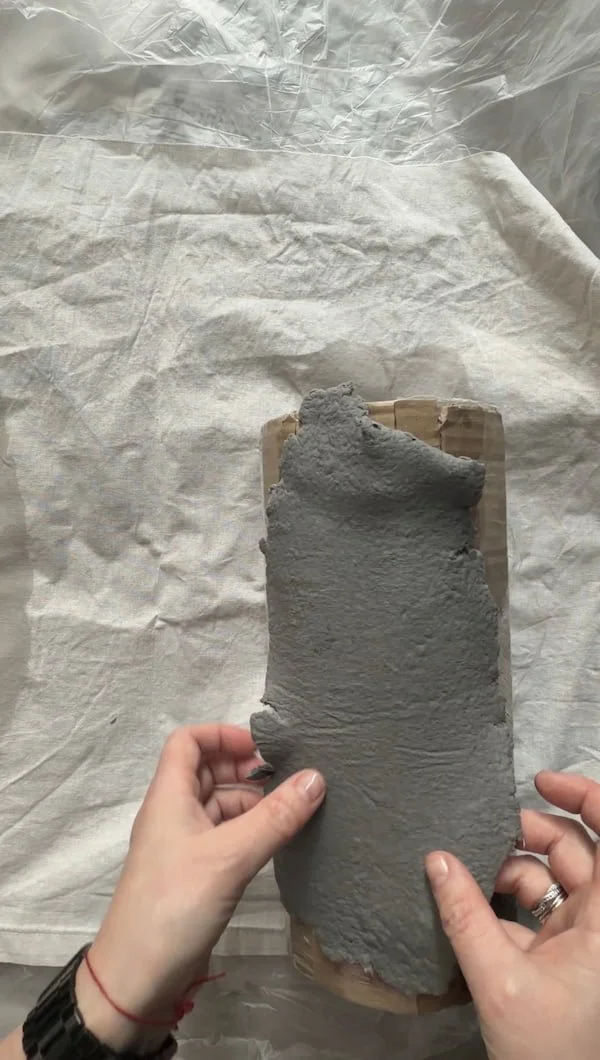
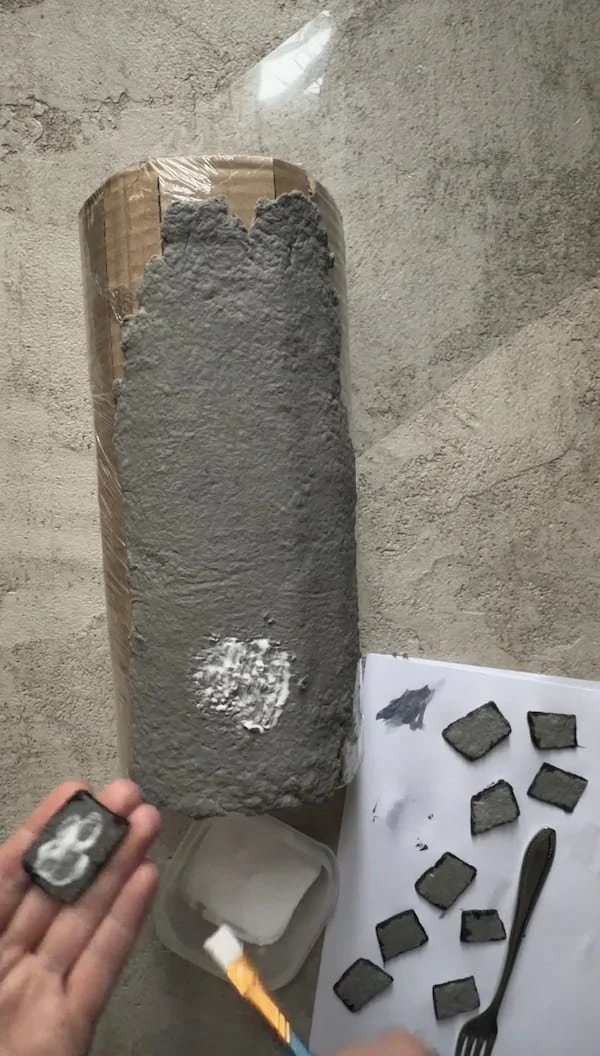
Step 2: Creating the Base Layer
Now we prepare the base layer onto which we’ll attach the squares.
Start by rolling out the paper pulp.
Protect your table or work surface with plastic foil. On top of that, place an old piece of fabric such as cotton or linen. Then add the paper pulp, cover it again with fabric, and finally with another layer of plastic.
The fabric will absorb excess moisture, while the plastic protects both your surface and the rolling pin.
Once the pulp is evenly rolled out, carefully apply the sheet onto your cling-film-wrapped base form.
A small tip here.
In the video and photos, you’ll notice that I start applying the layer from the middle. Later on, I realised this was a mistake.
It’s much better to begin at the top edge, smooth everything out carefully, and then work your way down.
Starting from the middle meant I later had to adjust the squares and compensate for the alignment, which made the process longer and slightly more complicated.
But that’s what happens when you try something for the first time. Most of my projects are first versions — and sometimes you only discover the better solution while you’re already in the process.
Step 3: Shaping the Square Elements
Step 4: Painting the Edges
Next, paint the edges of each paper element.
In my case, I used black watercolor paint.
It’s important that the squares are still slightly damp. This allows the paper to absorb the pigment from the brush and pull the color naturally into the surface.
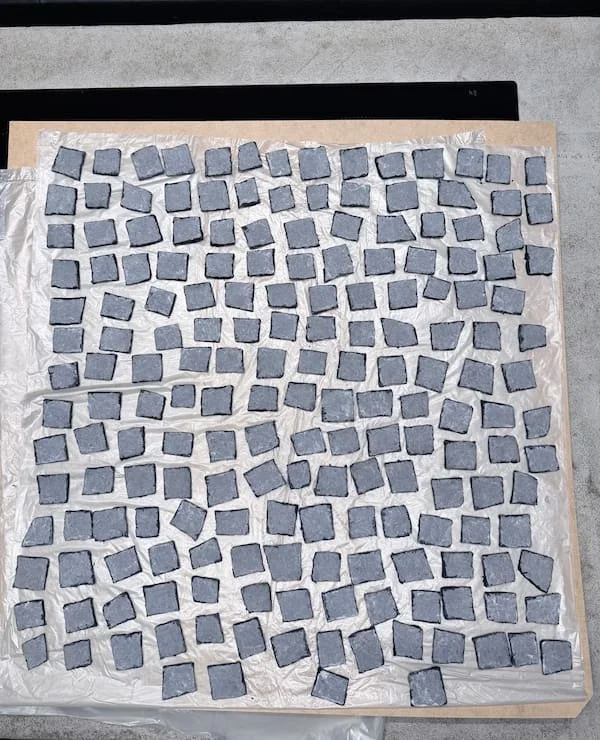
A small tip: don’t prepare all the elements at once. It doesn’t make sense. By the time you cut, paint, and start attaching them, too much time will pass — and everything will dry out. That’s exactly what we want to avoid.
I worked in smaller batches, around 50 pieces at a time, and then applied them before moving on to the next set.
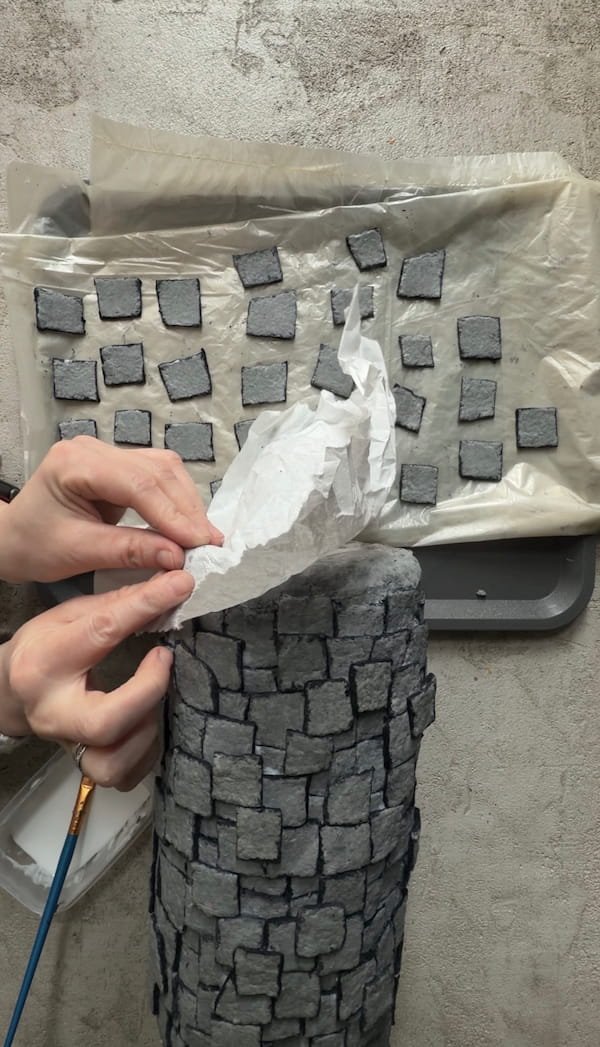
If you ever need to step away from the project — especially after applying the base layer or cutting your squares — cover everything with a damp cloth and place it somewhere cool. This will prevent the material from drying too quickly and keep it workable when you return.
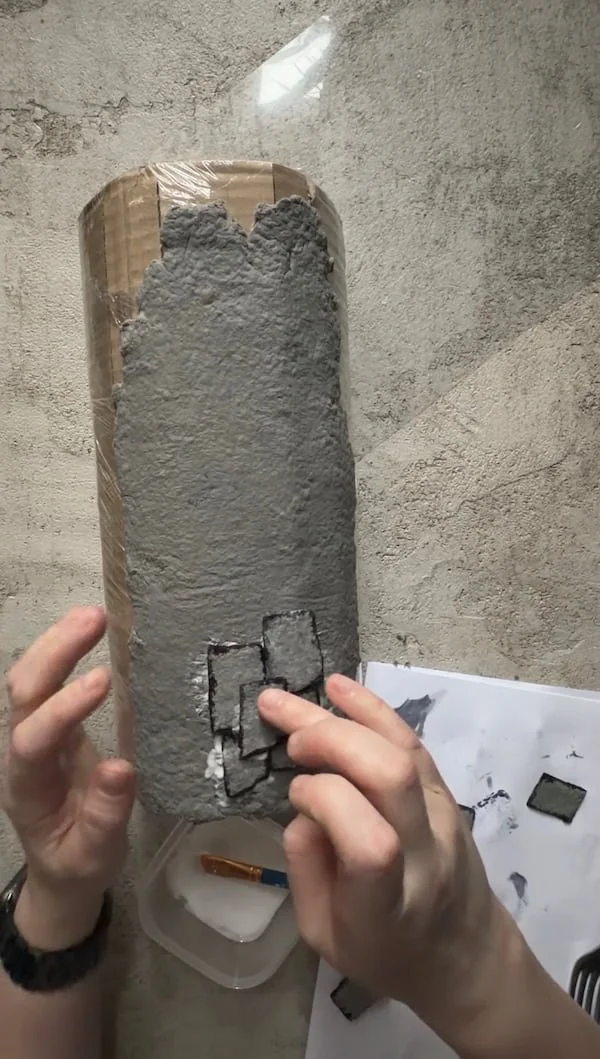
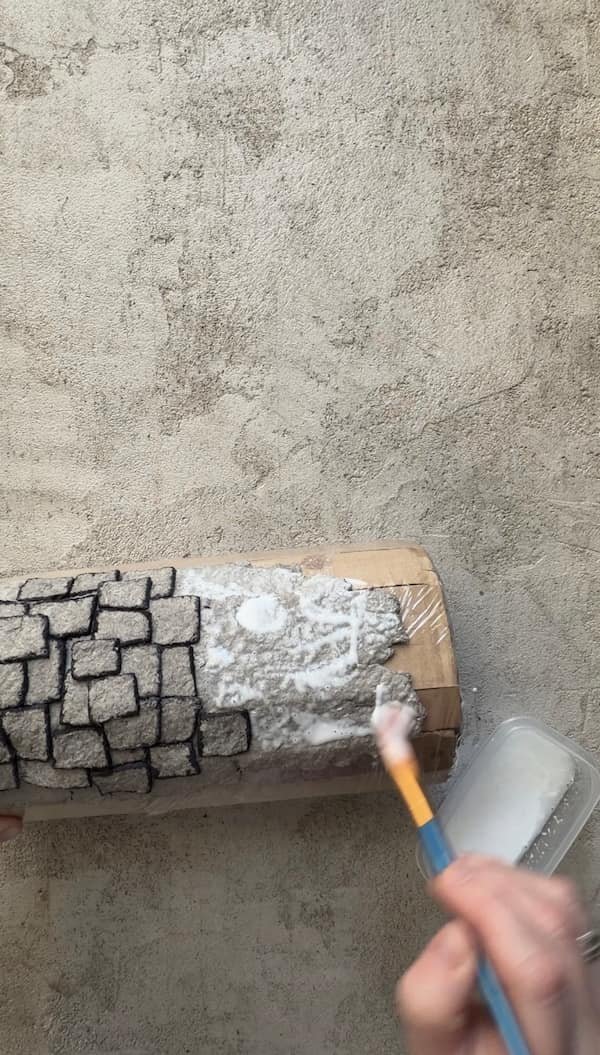
Step 5: Attaching the Squares
Now it’s time to attach the squares.
As I mentioned earlier, start from the top edge. This makes it much easier and faster to complete the whole “composition.” Think of it like laying tiles.
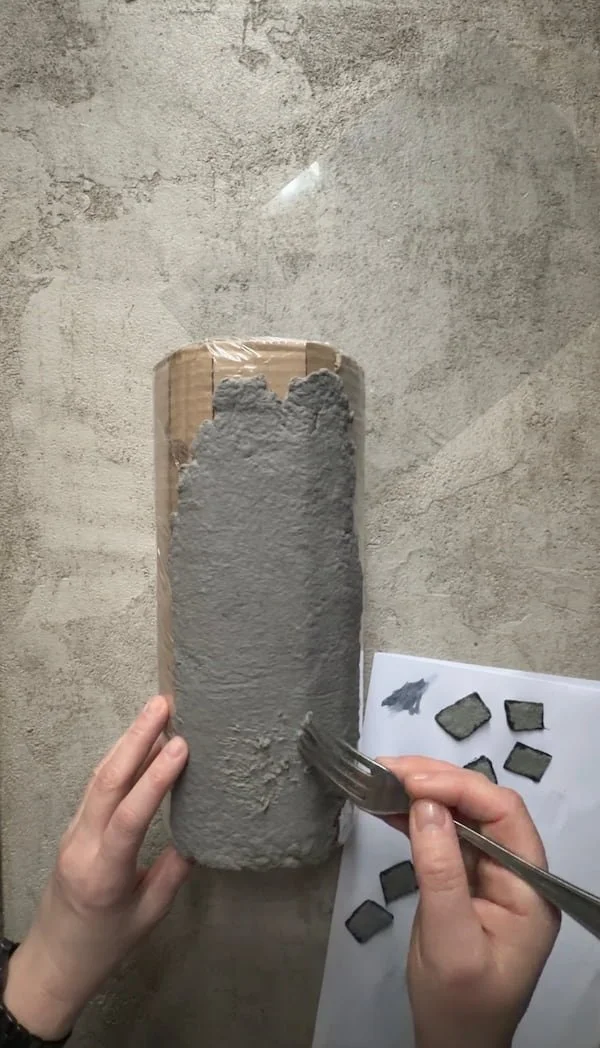
Before attaching the pieces, lightly score or roughen the base layer. This helps the surface grip better. You can use something simple, like a fork, to gently texture the surface.
Next, apply PVA glue both to the base and to the back of each square. Then begin placing them one by one, working your way from top to bottom.
Once a section is covered, allow it to dry slightly.
After that, repeat the process — continuing downward until the entire surface is covered with squares.
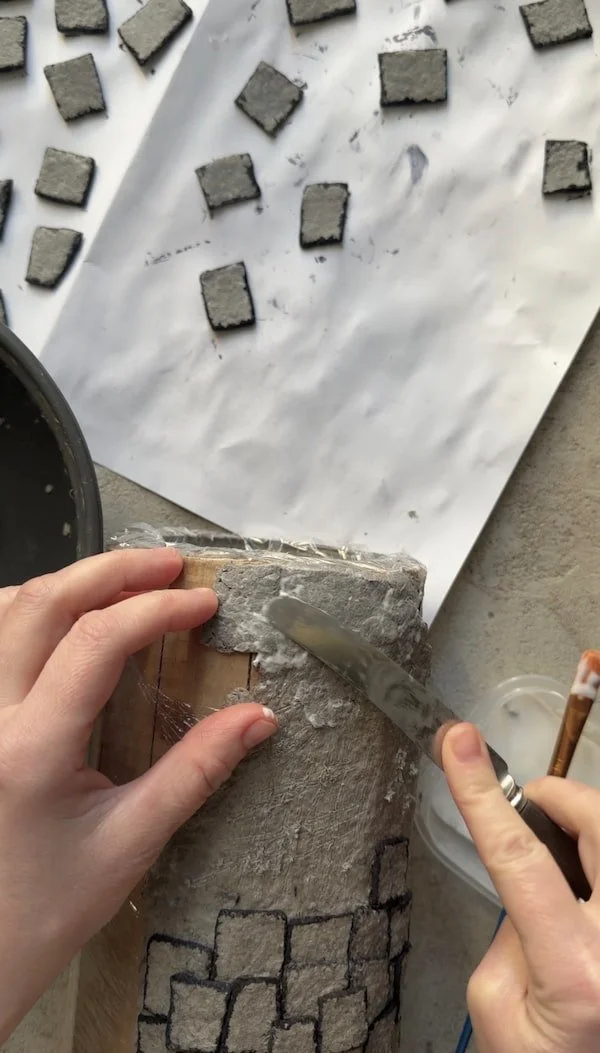
Step 6: Finishing the Bottom
The final step is finishing the bottom of the vase.
I decided not to create a sharp, straight edge. Instead, I gently bent the lower squares inward at a soft angle, rather than folding them sharply. This gives the form a more natural and fluid transition.
First, I applied a base layer of paper pulp to the bottom, extending about 1.5 cm toward the center. I intentionally left an opening in the middle. This allows space to insert a bottle inside, so the vase can safely hold fresh flowers.
The piece itself is a cover, with a carefully finished underside.
I didn’t want the bottom to look simply cut off or flat. Softly curving the squares inward creates a more thoughtful and complete finish.
Finally, leave the entire piece to dry completely.
Once the form is fully dry, carefully remove the glass container and the cardboard layer from inside.
And voilà — your vase is ready.