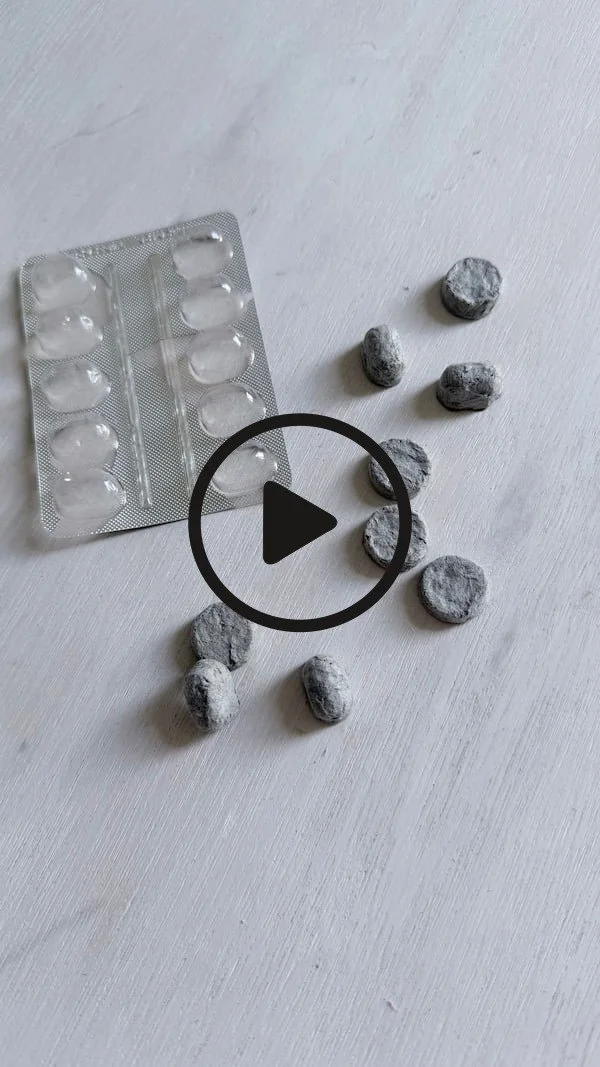
Shaped Studies 2 — Blister Elements
In this experiment, I used empty blister packaging as moulds for paper pulp. I’m always looking for opportunities to reuse and transform things that might seem disposable or insignificant at first glance. In the creative process, almost anything can become a tool, a texture, a form, or a starting point.
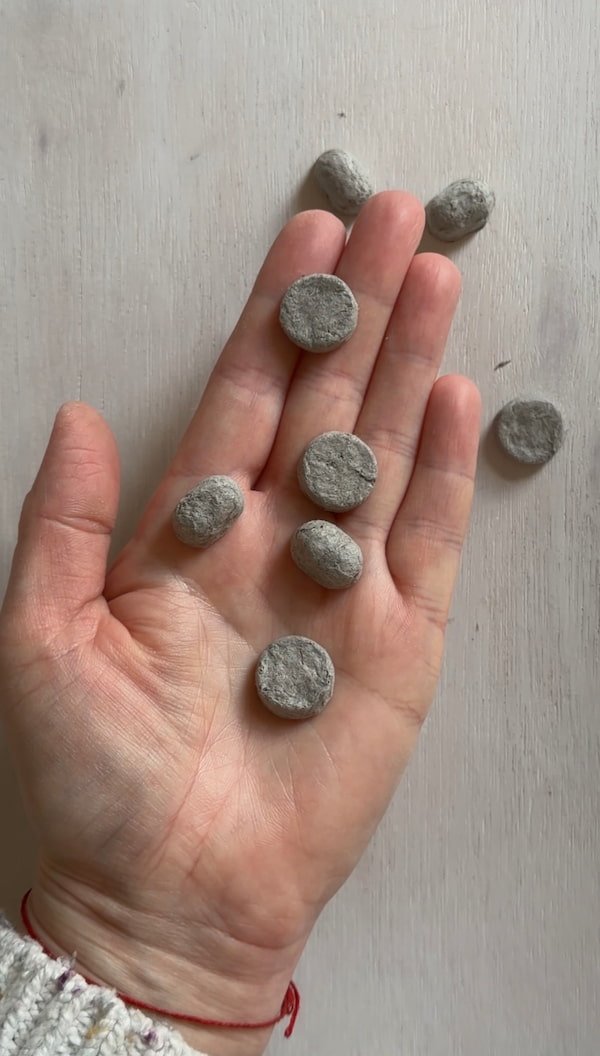
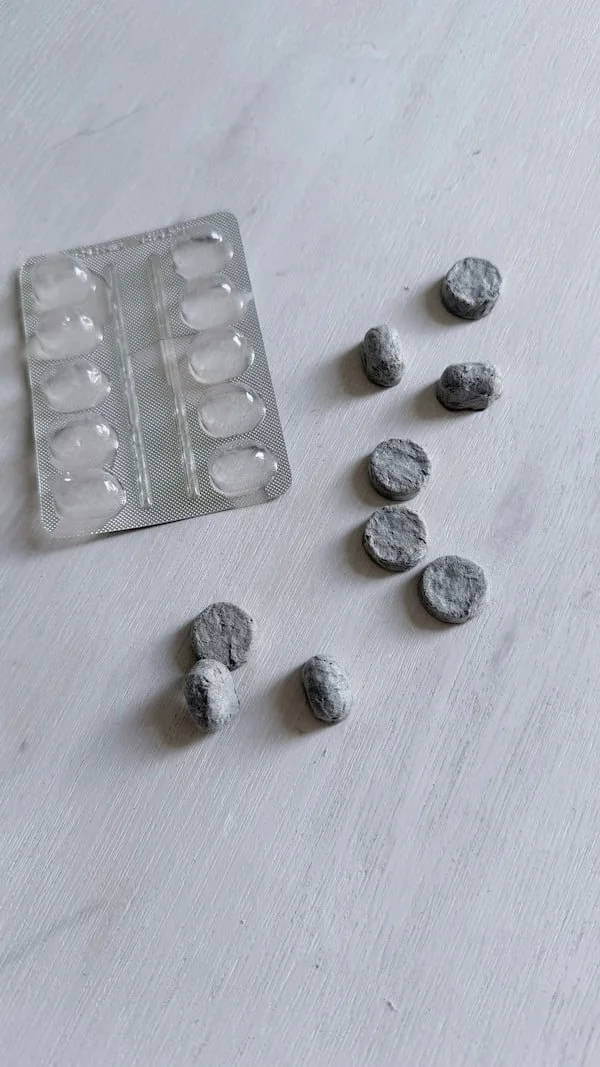
The resulting elements have a decorative, organic character and can be used in many different ways — as small details, parts of larger compositions, or as a base for further experiments with paper pulp and surface texture.
For some time now, I’ve been collecting empty blister packs from medications. At first, I didn’t have a clear idea of how I would use them, but I knew their shapes had potential. The repetitive forms and small cavities felt like something that could be translated into texture or structure in my work.
Over time, it became clear that they could work as simple moulds for paper pulp, allowing me to capture those shapes and turn them into small, tactile elements.
CHECK OUT FULL TUTORIAL BELOW:
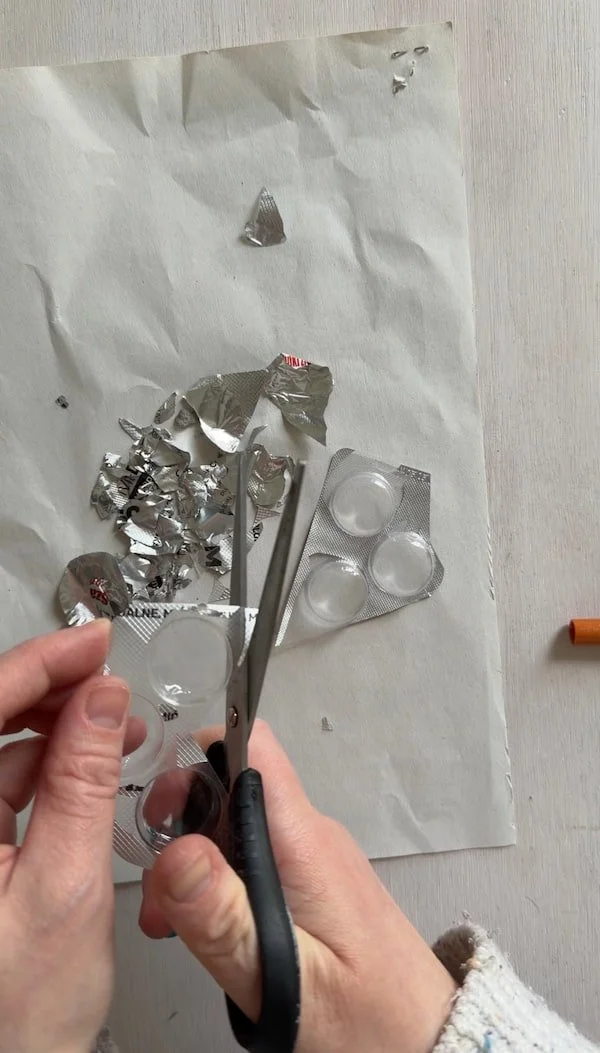
Preparing Blisters for Moulding
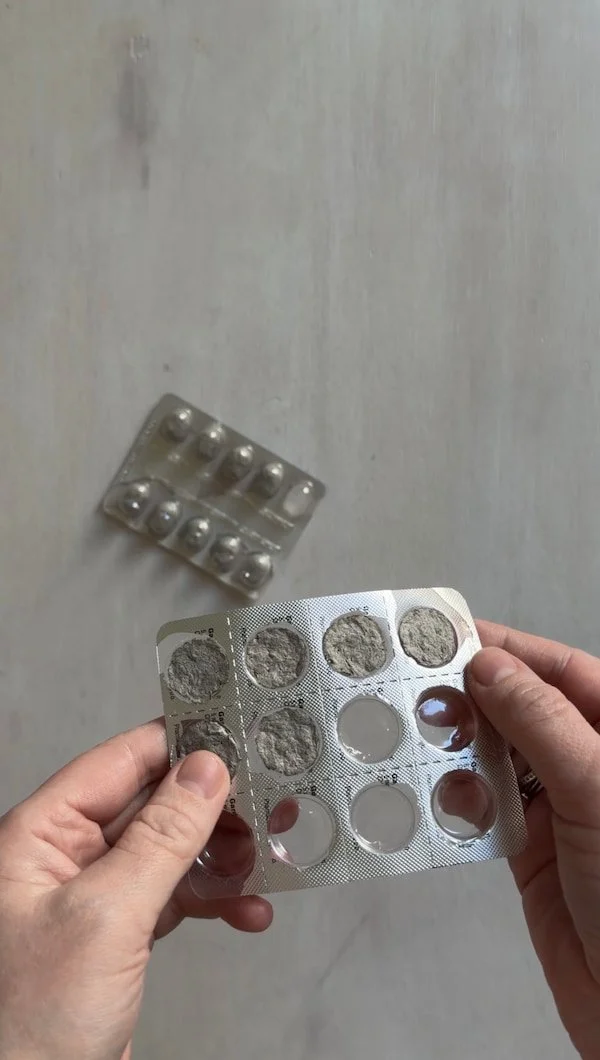
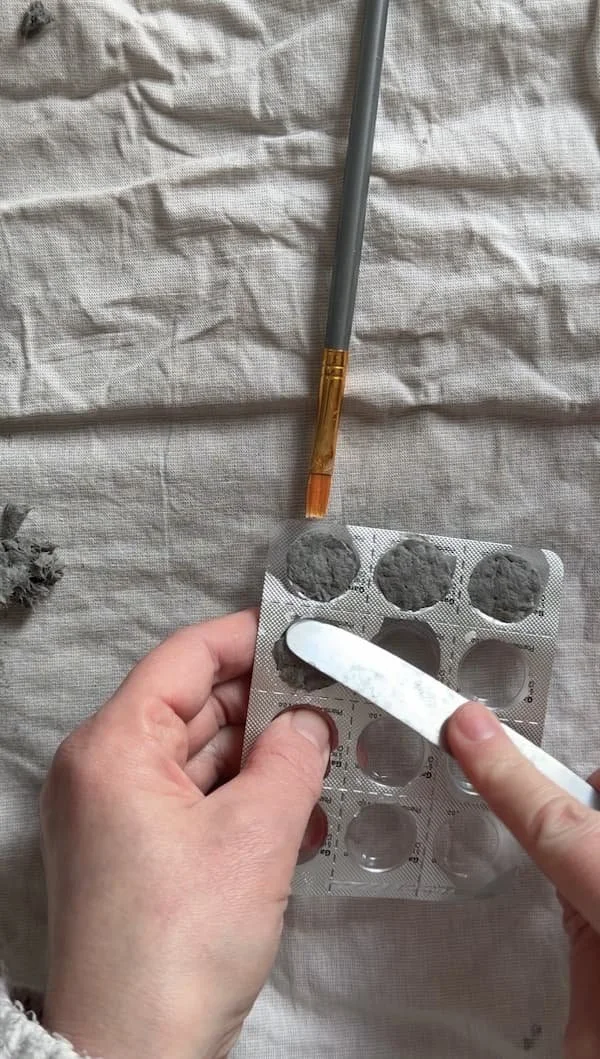
To start, the blister packs need to be prepared for use. First, remove as much of the foil backing as possible — after pushing the tablets out, it usually stays torn and uneven on the back, so it’s best to clean it up to create a smooth working surface.
If you’ve cut the blisters into smaller pieces, the edges can be quite sharp. It’s a good idea to trim and slightly round them to avoid cutting yourself while working.
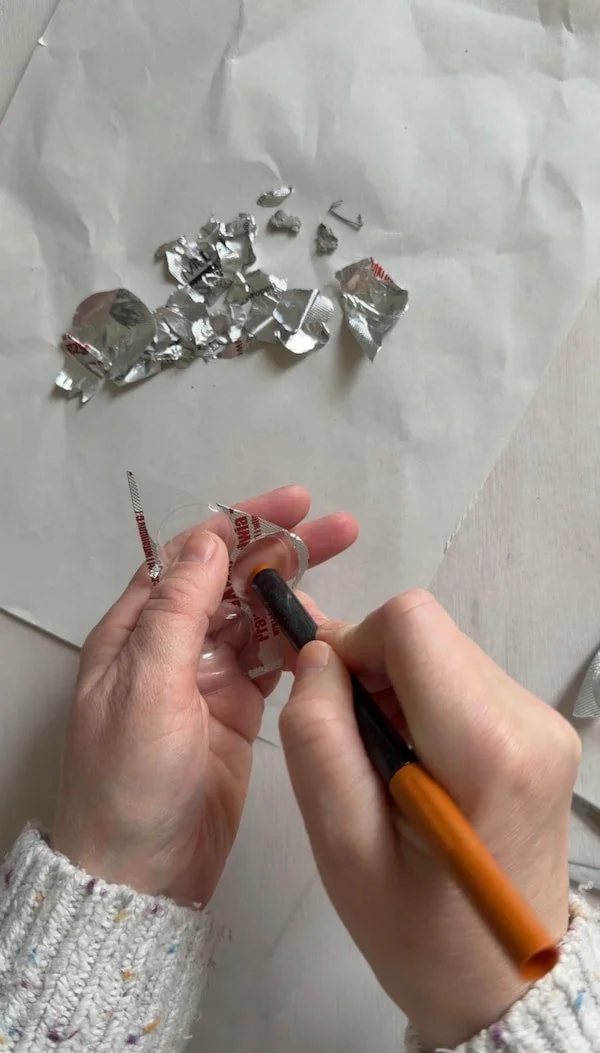
Next, gently reshape the plastic. Pressing the tablets out often leaves dents and distortions, so these need to be evened out. A pen or any tool with a rounded tip works well for this — simply press and smooth the surface until the form is more regular again.
Once prepared, the moulds are ready to be used for creating decorative paper pulp elements.

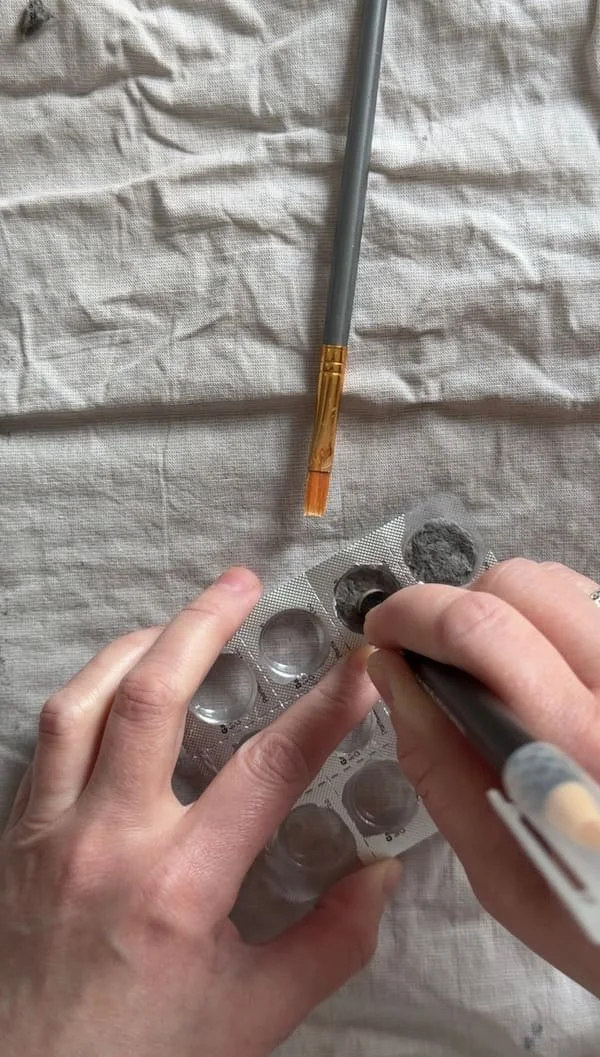
Filling with Paper Pulp
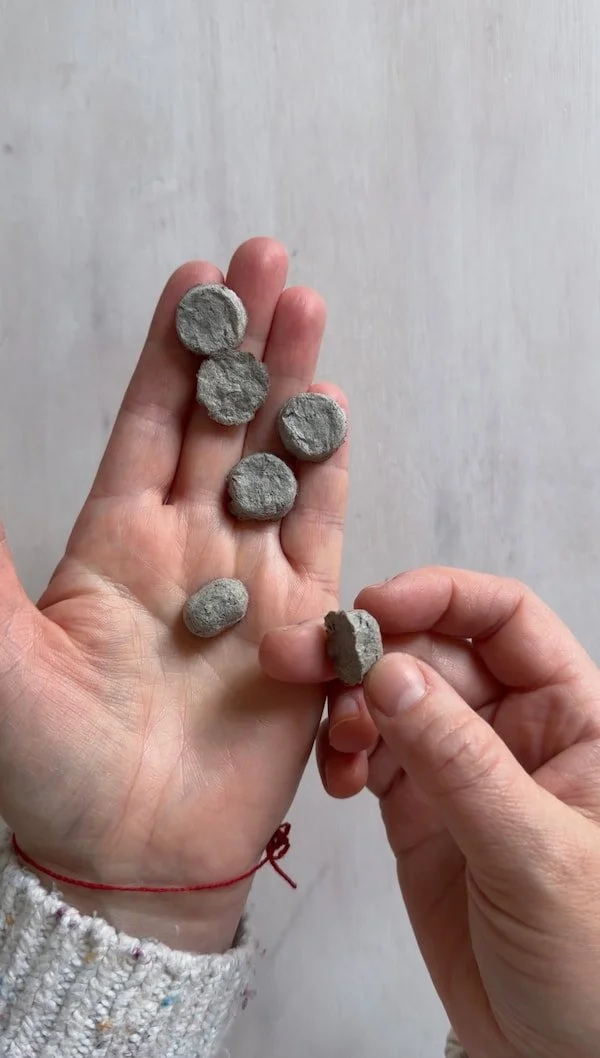
In the next step, we use paper pulp (you can find my recipe for making it in my post here). Place a small piece of pulp into the blister mould. Using something like a pen or the firm end of a brush, press the pulp evenly into the form. Finally, you can smooth the surface with a knife and then leave everything to dry.
Sanding and Finishing Edges
Once everything is dry, we end up with paper shapes that are best refined by using sandpaper or a file to smooth the edges.