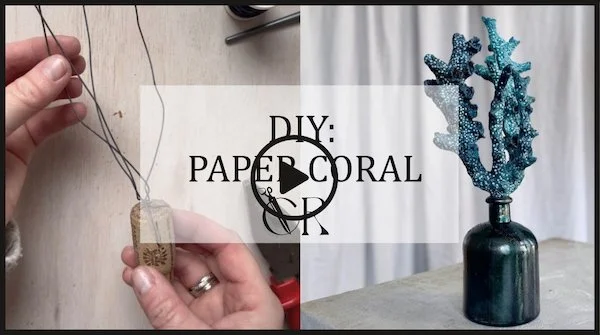
Inspired by the Ocean | Handmade Coral Sculpture from Paper
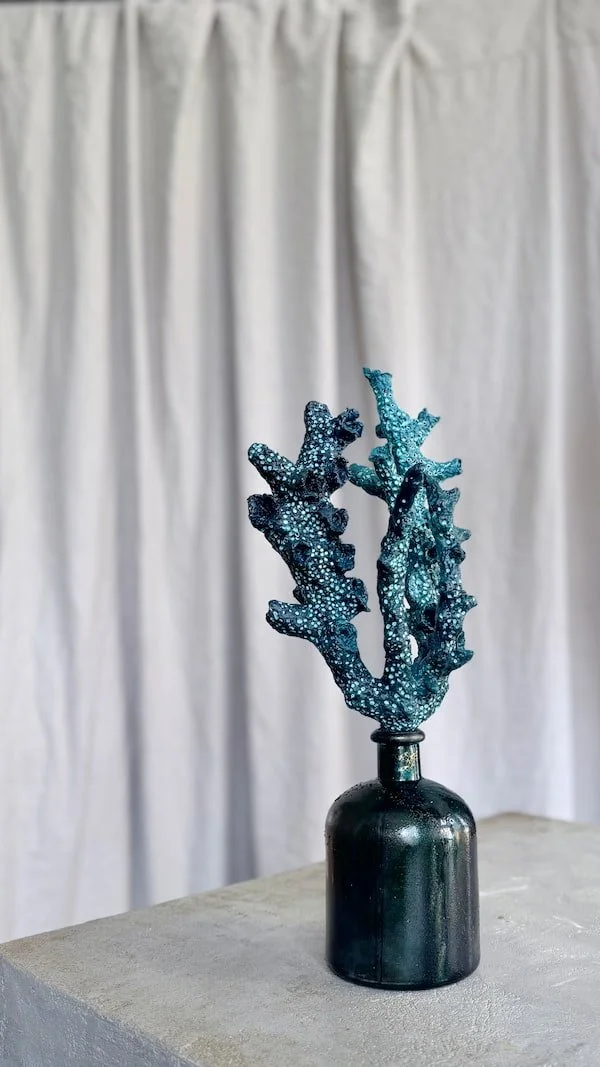
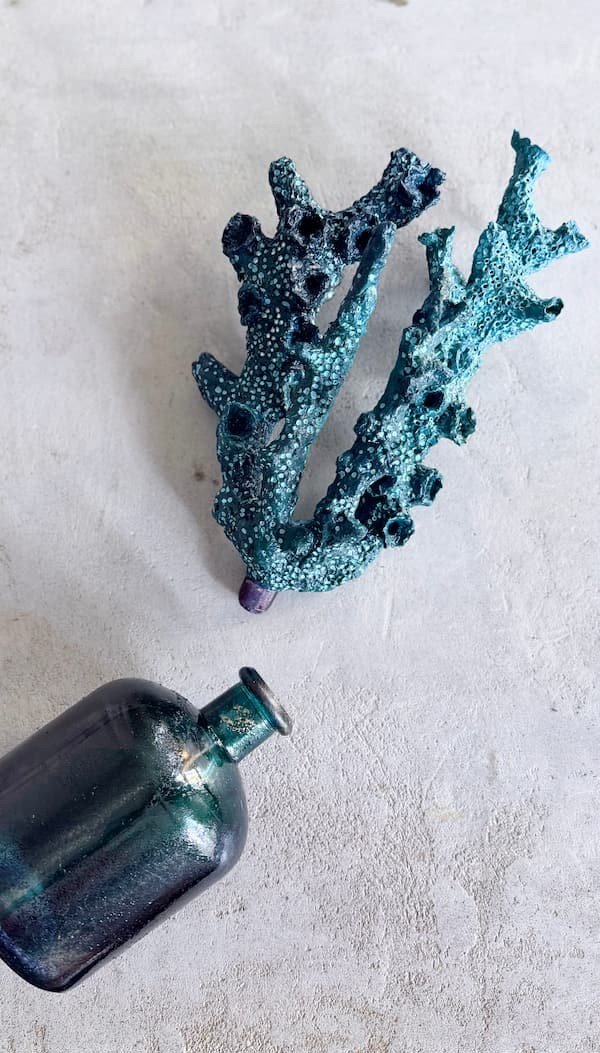
This project stayed with me for quite a while. Like many times before, I found myself stuck on the colour — wondering whether to leave it raw and grey, keep it white, or finally go in a more expressive, colourful direction. In the end, I chose a palette of deep navy, turquoise, and blue tones, which felt closest to the mood I had in mind.
As I mentioned in my previous posts, I’m currently focusing on finishing older projects, and this coral piece is one of them. It’s been waiting for its final form, and I’m really happy I came back to it.
Make sure to go through the instructions carefully, but I strongly encourage you to watch the video as well. This process is very layered and intuitive, and it’s much easier to understand when you can actually see it happening. If I tried to show every single step in photos, there would be far too many, and even then I wouldn’t be able to fully explain everything.
So once again, I invite you to watch the full video. Here, I’ll briefly go through the key stages, share a few helpful tips, and also mention what didn’t quite work for me during the process — and what to watch out for when creating your own version.
CHECK OUT FULL TUTORIAL:
What you’ll need:
paper pulp (you can find the recipe here – link)
a wine cork
a marker
two types of wire (one thicker, one thinner)
a mini rotary tool
newspaper
PVA glue
a container with water
scissors
a brush
tools for creating texture (sculpting tools, toothpick, pencil, etc.)
paint
a small piece of sponge
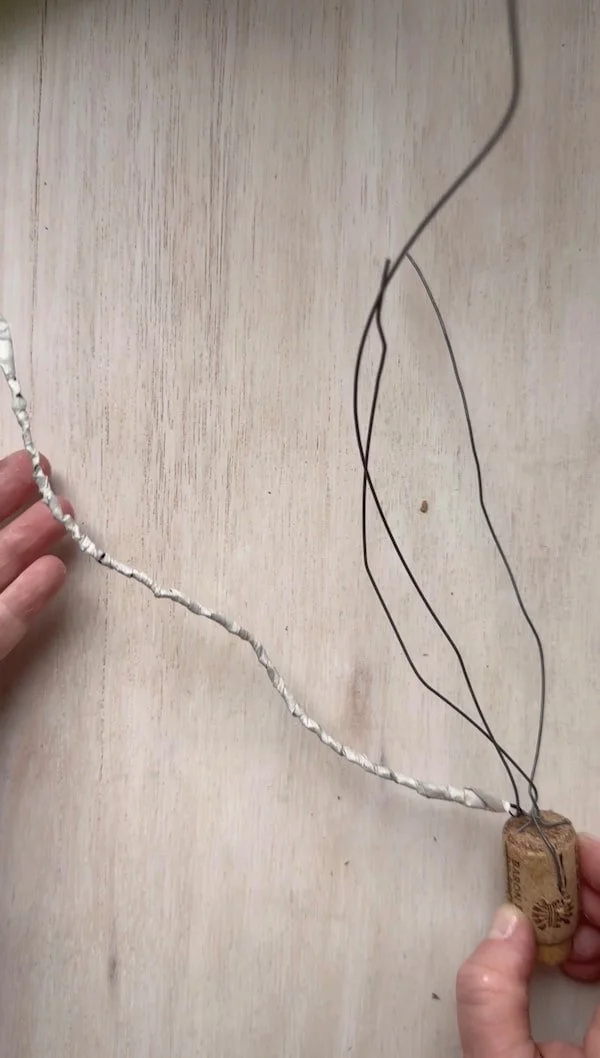
1.Building the Base Structure
Start with a classic wine cork. At this stage, I strongly recommend cutting it in half. You won’t see this step in my photos or video, but I later realised that this small adjustment makes a big difference to the final proportions. I had to shorten mine afterwards, which turned out to be quite challenging, so it’s much easier to do it now.
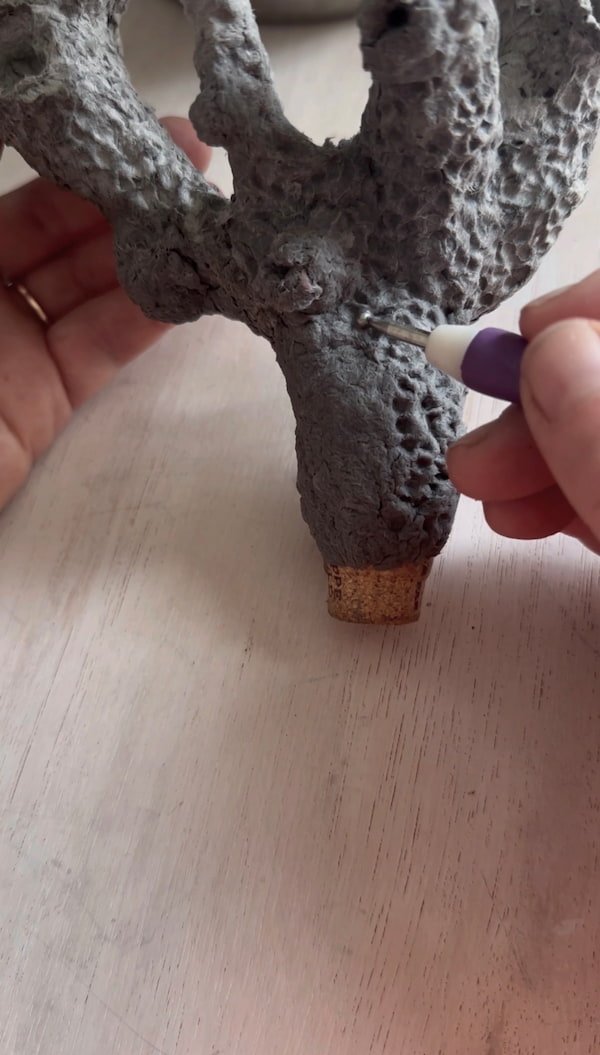
Next, use a pen to mark four points around the cork, placing them opposite each other, like positions on a clock. Then draw short lines extending upward from each point. These marks will guide both the drilling and the shaping.
Drill straight through the cork at each marked point, going all the way through to the opposite side. Then carve shallow grooves along the lines you drew. The wire will pass through the holes and then sit neatly inside these grooves before being twisted together at the top.
Use fairly long pieces of wire. Once you thread a wire through a hole, it will naturally split into two sides, forming two arms of your structure. This is a good moment to think about the length and proportions of your sculpture, as each wire will define the reach of the final form.
Wrap each of the four arms with a thinner wire. This creates a slightly rough surface, helping the paper and pulp adhere better and stay in place as you continue building the sculpture.
Cut thin strips from newspaper and use a mixture of PVA glue and water to cover the wire arms, wrapping the paper around them evenly.
Once the newspaper has fully dried on the wires, apply a thin layer of paper pulp over the entire surface.
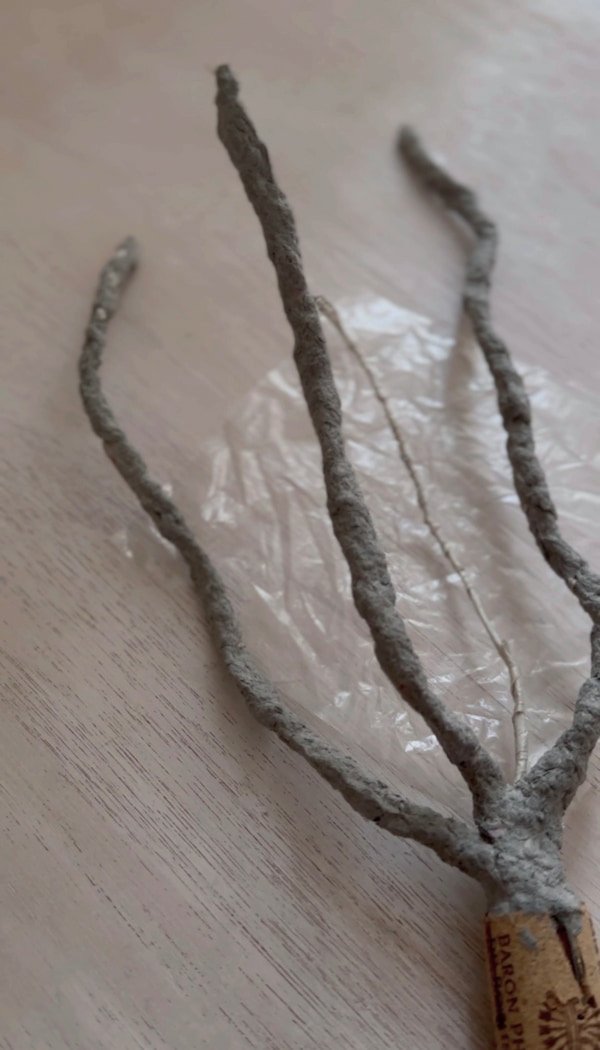
2.Building Form and Texture
Once the first layer is completely dry, apply a larger amount of paper pulp, shaping it as you go. This is the stage where you begin to define the form and create texture.
Work in sections rather than covering everything at once. The process is quite time-consuming, and the pulp can start to dry before you have a chance to shape it, making it much harder to work with.
It’s best to focus on one arm at a time, working on one side first. Let it dry, then turn to the other side of the same arm before moving on to the next section.
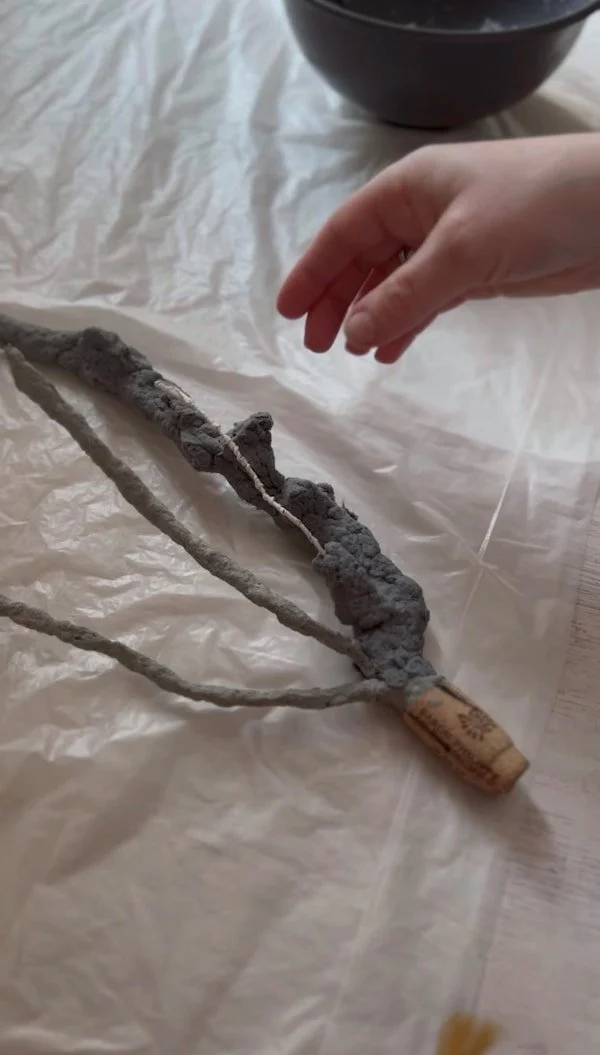
3.Creating Texture
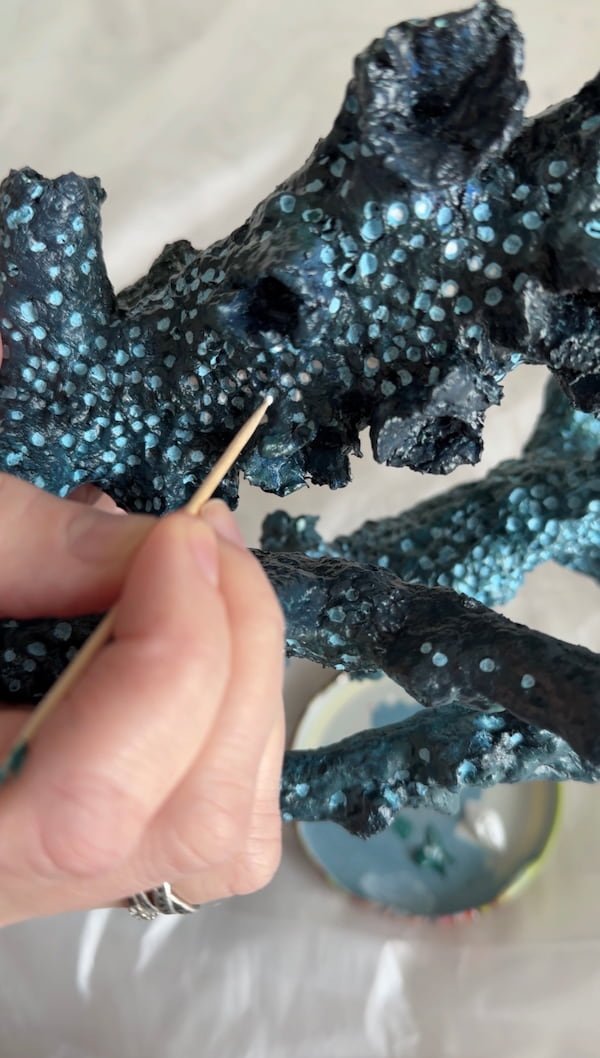
To create the texture, I focused on building lots of small indentations across the surface.
For this, I used ball-ended tools in different sizes, along with a sculpting tool. However, simple alternatives like toothpicks, pencils, or any pointed objects will work just as well.
Start by smoothing the pulp on each arm using a brush and a mixture of PVA glue and water. This helps refine the surface before adding texture. Once it’s slightly set but still workable, begin pressing in small indentations using your tools.
If you’d like to add more pronounced, protruding elements, you can use toothpicks as a base and build the pulp around them to create structure and support.
Leave everything to dry completely, then repeat the same process for the remaining sections, working gradually across the entire piece.
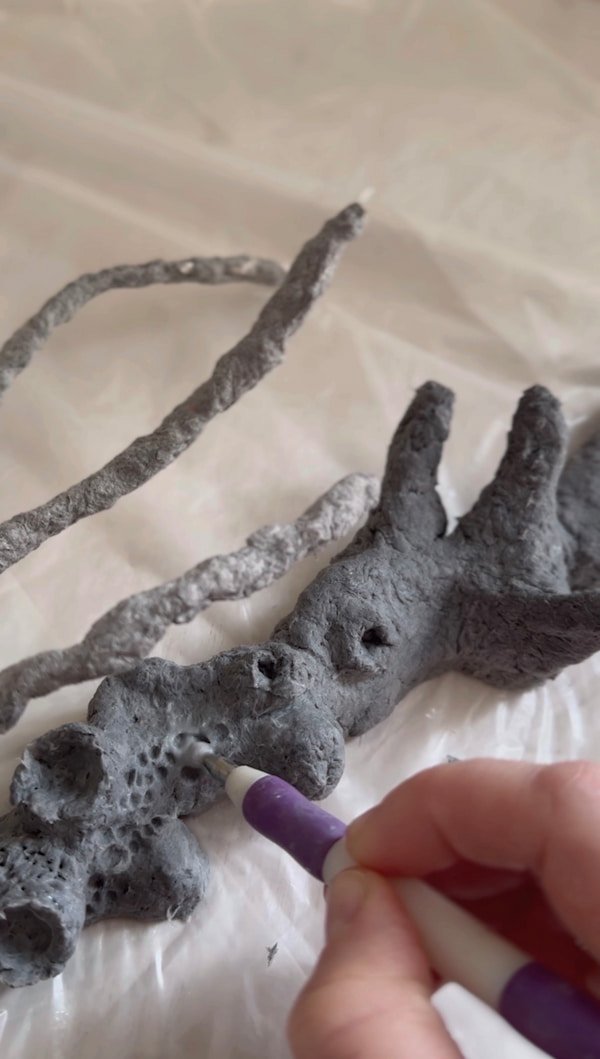
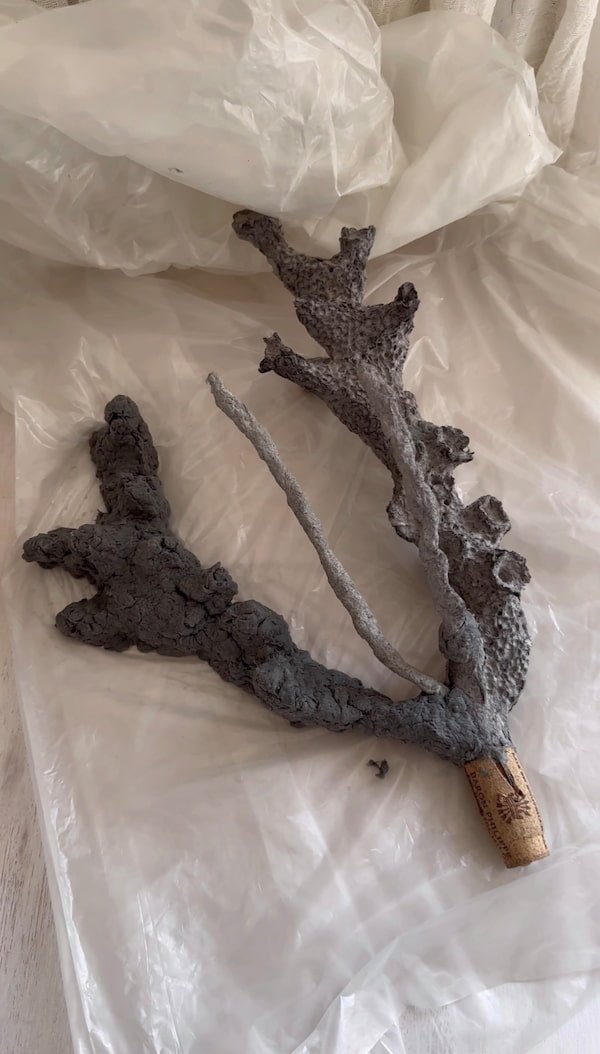
Once the entire piece is finished and fully dry, the wires around the cork need to be concealed.
Apply paper pulp over the cork, covering any visible wires, and use the same tools to create a matching texture. Leave it to dry completely.
4.Painting and Finishing
Next comes painting the entire coral piece.
I couldn’t decide on the final colour at first, so I started by painting everything white, which already looked quite beautiful. But since I treat each project as an experiment, I decided to move towards shades of green and blue.
To create depth, I painted the whole piece in a light green base first. Then, using a small piece of a regular kitchen sponge, I applied darker tones over the surface. This allowed the lighter colour to remain in the indentations, while the outer areas became darker, enhancing the texture.
During the process, I also deepened selected areas even further to add more contrast and variation.

I also added extra detail by painting some of the indentations with white or very dark navy tones to enhance contrast and depth.