Shaped Studies: Part 1

This is the beginning of a new blog series – Shaped Studies. In each part, I explore a different approach to shaping paper pulp using various objects as a base. Sometimes they’re standard forms like spheres or ovals, sometimes more unexpected or improvised items that simply work well for molding. The goal is to observe how the material behaves, how it takes on form, and how those forms can be used in creative ways.
In Part 1, I used a small ball – specifically, a dog toy ball. It’s lightweight, firm, slightly flexible, and easy to find. Once wrapped in cling film, it becomes a perfect mold for paper pulp: it doesn’t stick, and its smooth surface allows for clean application and removal.
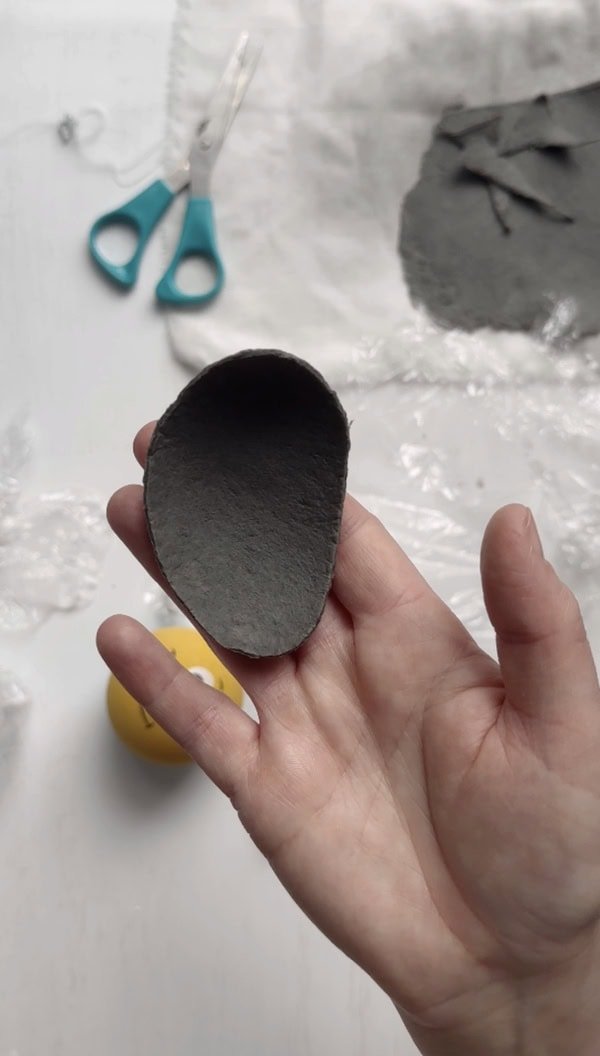
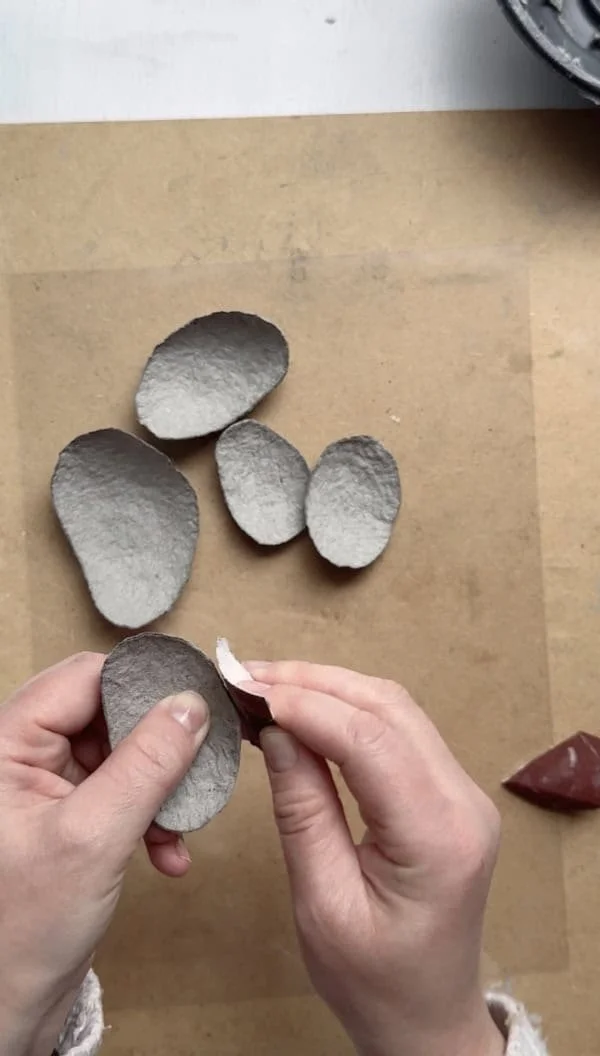
The resulting shape is a semi-open, shell-like form. Simple, but useful for testing how the pulp dries, holds its shape, and detaches from the base. This form is easy to replicate and can also work as a modular piece for building larger structures.
The shape itself is very versatile and can be used in many different projects. A single piece resembles a petal, making it ideal for building layered paper flowers. It also works as a mini dish – perfect for storing jewelry, needles, spices, or incense. When grouped or arranged in a pattern, these forms could become part of a wall installation, a sculptural lampshade, or even a textural relief element. It’s a flexible base that’s easy to repeat and experiment with further.
In future parts of this series, I’ll test other shapes and materials to see how pulp behaves on different surfaces. It’s an open project – every new form leads to another.
You can watch the full step-by-step video on YouTube – link below.

What You’ll Need
To make the form, you’ll need:
– a ball (e.g. a dog toy ball, plastic or rubber) or another object with a similar shape, such as a styrofoam sphere,
– cling film – to cover the surface and make it easier to remove the pulp once dry,
– paper pulp, which you can prepare using the recipe available on my blog → [link to recipe],
– a pair of scissors
– fine sandpaper (for finishing edges)
Step 1: Preparing the Base
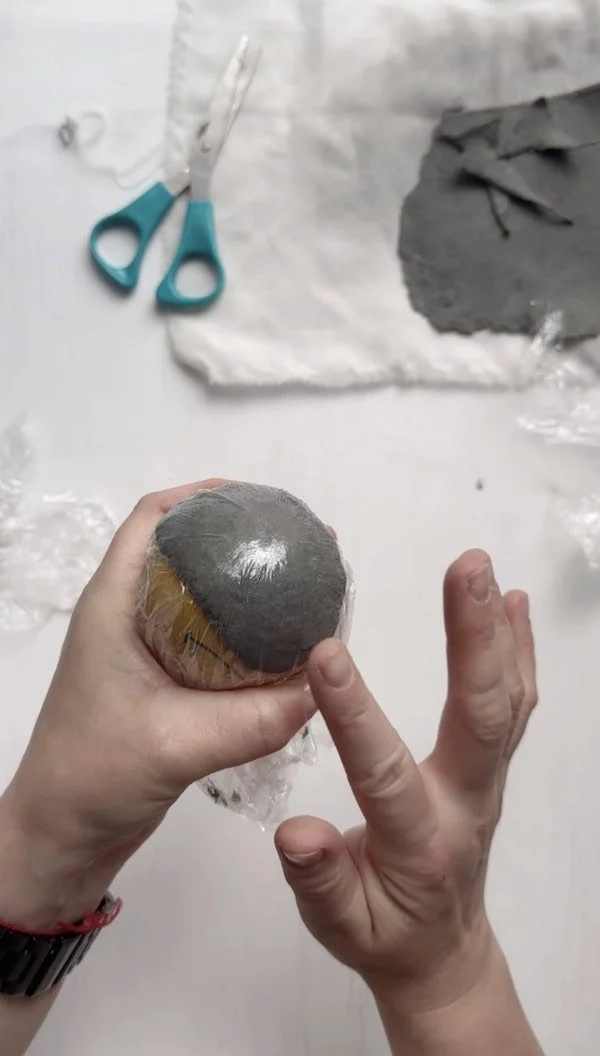
Start by covering the ball with cling film. Wrap it tightly from all sides, making sure the film sticks smoothly to the surface. This will help the paper pulp lay evenly, creating a clean shape that's easier to remove once it's dry.

Step 2: Rolling and Cutting the Pulp
The next step is to roll out the paper pulp to the thickness you want. However, make sure it’s not too thick, as you’ll need to cut out a shape from it.
Use a pair of very sharp scissors to get clean edges – blunt scissors can tear the pulp instead of cutting it smoothly. The quality of the cut will affect the final look of your form.
If you have a specific design in mind (like a petal, small bowl, or decorative module), you can also use a paper template to help with shaping.

Step 3: Shaping on the Ball
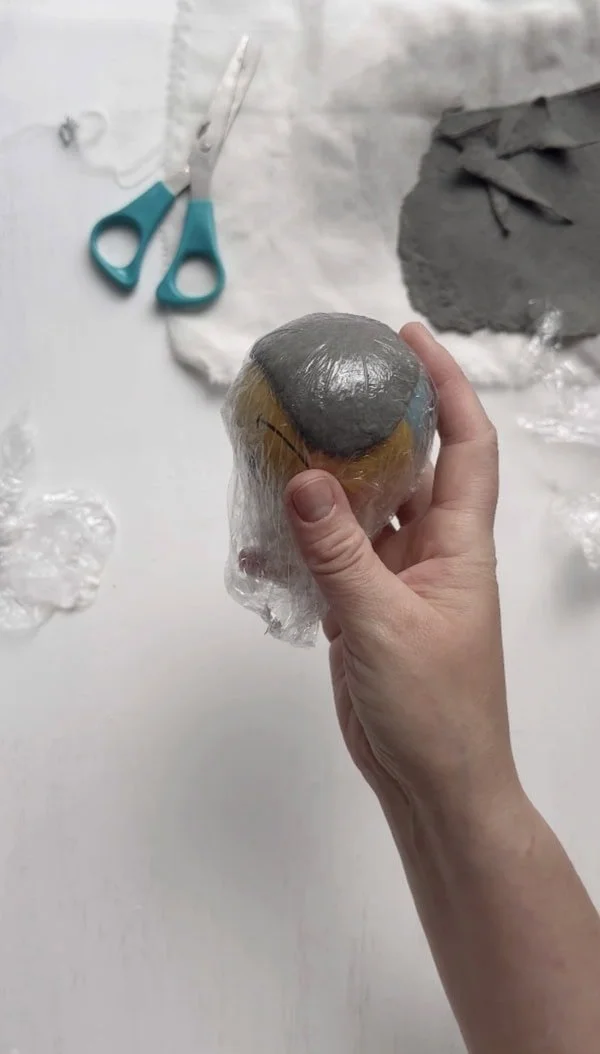
Place the cut piece of paper pulp onto the ball that’s already wrapped in cling film. Then, cover it with another layer of cling film. This makes it easier to press the pulp down evenly and helps the surface stay smooth and flat.
Use your fingers to gently smooth the edges, making sure they sit nicely against the form and have a clean finish. Taking a bit of time here will make the drying process and any finishing much easier later.
Leave everything to rest for about 30 minutes, so the pulp can settle and start bonding to the surface.


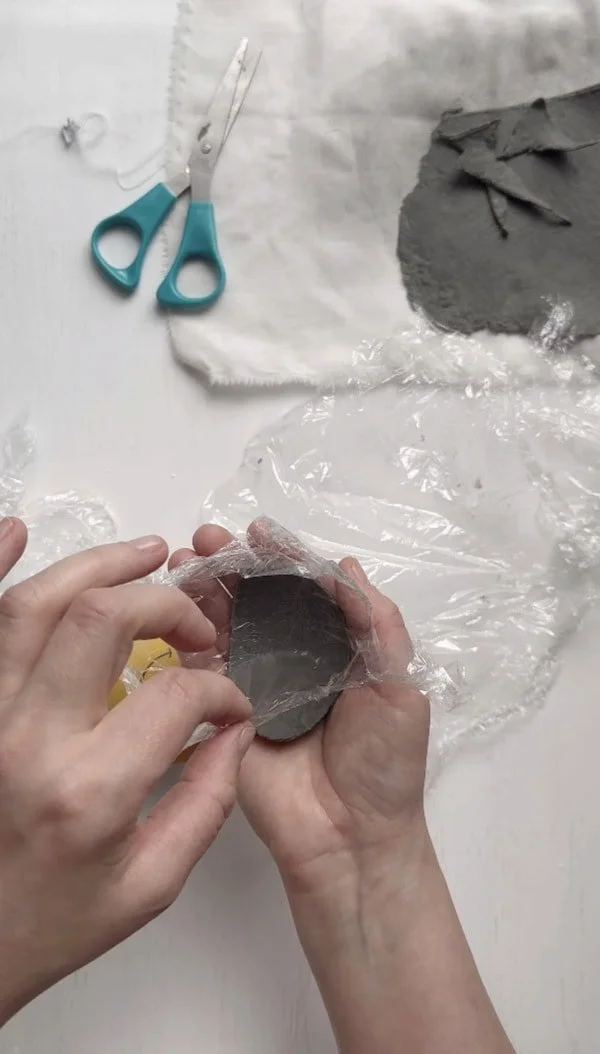
Step 4: Removing the Form
After about 30 minutes, carefully remove the cling film from the ball, making sure not to damage the structure. Then, gently peel the film away from the paper pulp.
At this stage, the form should already hold its shape, but it’s still very fragile and needs to dry completely before any further handling or finishing.
Step 5: Smoothing the Edges
Once the form is completely dry, you can move on to finishing. Gently sand the edges with fine sandpaper to even them out and make them smoother. This step is optional, but it helps achieve a cleaner, more polished look – especially if the form will be part of a larger project or used functionally.
Further possibilities
The finished piece is just a base – the first step in further making. You can leave it raw, but you can also paint it, cut out holes, add new details, or combine it with other shapes. It all depends on whether you want to create something functional (like a small dish, lamp, or hook) or purely decorative (like a petal, sculptural element, or wall ornament).
It’s an open structure – perfect for experimentation.