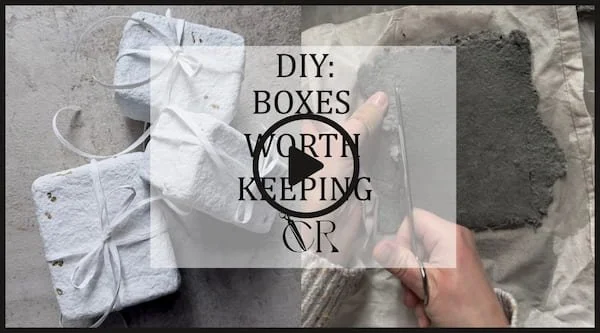
A Form That Stays — Decorative Paper Pulp Boxes
This idea came quite naturally, while I was working on my latest Christmas ornaments.
They were small gifts prepared for my family — handmade decorations made from paper pulp, created slowly, without rush, with attention to the material itself.
Once the ornaments were finished, a familiar question appeared — one that often comes back when working by hand:
how to package them in a way that the packaging is not just an addition, but part of the whole?
I didn’t want to reach for ready-made boxes or random wrapping paper. I was looking for something that would naturally complement the forms, underline their character, and stay with the recipient for longer. And then it occurred to me — I could make the boxes myself.
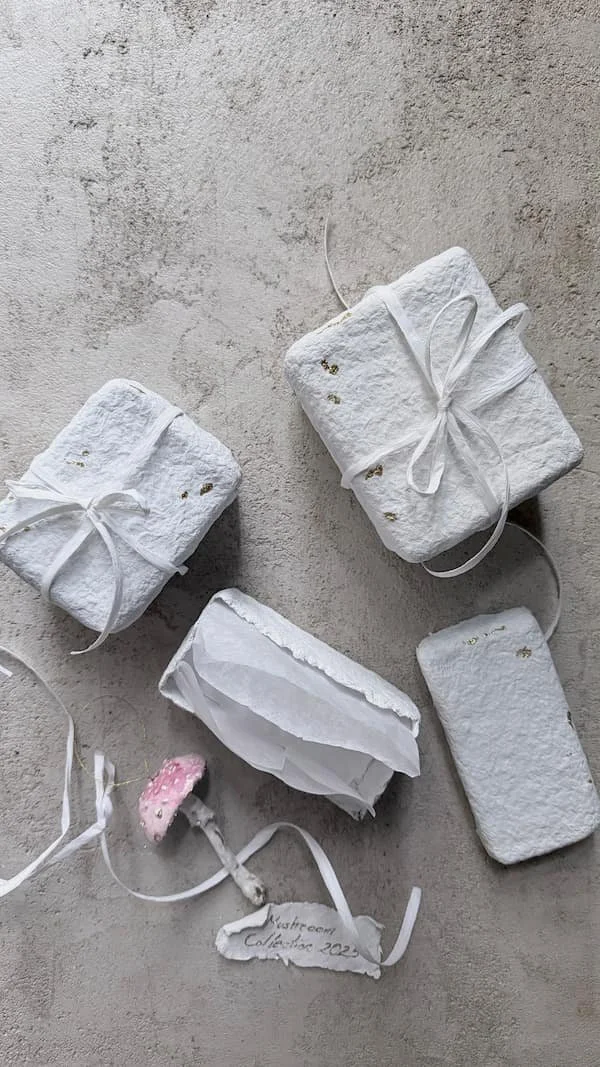
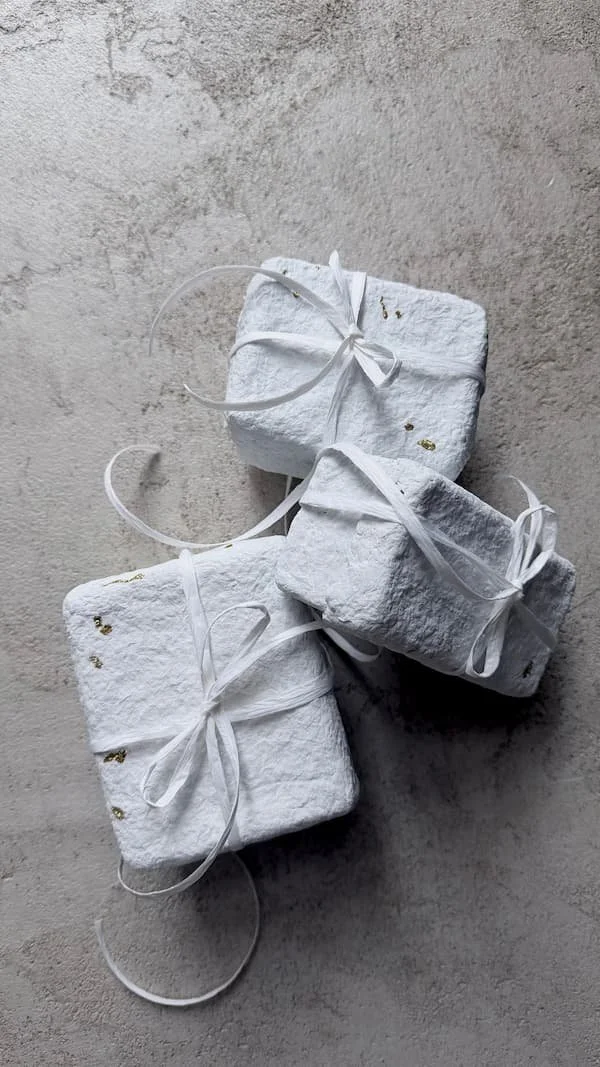
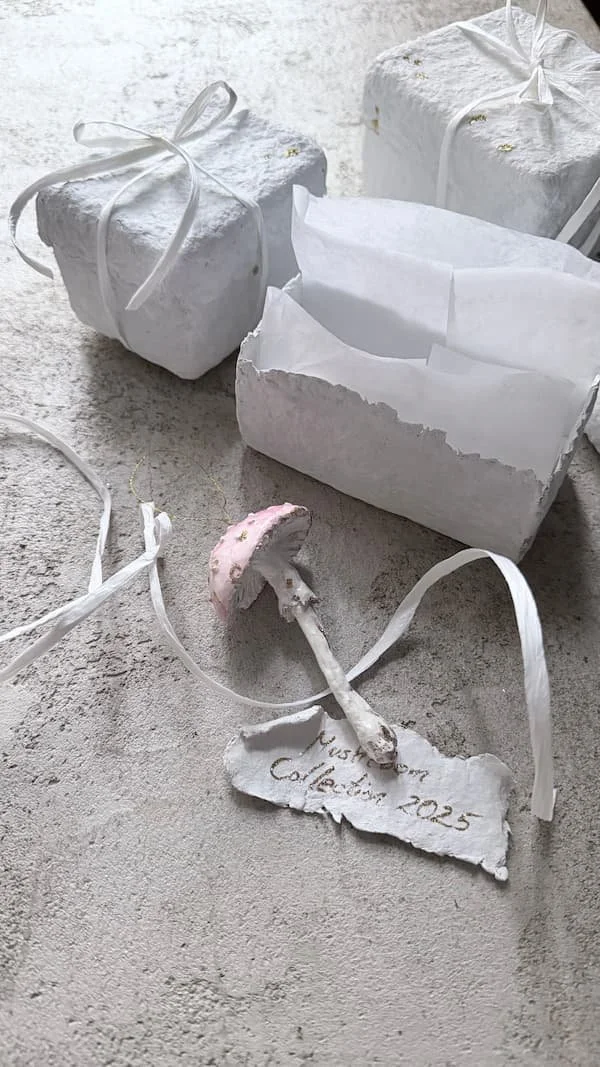
This is how these small, decorative paper pulp boxes came to life. Simple, raw, with a visible texture of the material. Not as disposable packaging, but as an object in its own right — something that can be kept, reused, placed on a shelf.
In this post, I show small boxes, perfect for gifts, Christmas ornaments, or little objects, but the technique itself offers much more freedom. It can easily be used to create larger forms, to experiment with paper colour, wall thickness, or surface finish — depending on the intended use.
If you’re curious about the Christmas ornaments I mentioned, you can find the previous post here.
Below, I share the process of making paper pulp boxes — step by step, without rushing, exactly the way I like to work with this material.
CHECK OUT FULL TUTORIAL:
What you will need:
paper pulp
boxes or objects to shape your paper pulp boxes
(for example: a bar of soap, a cotton bud box, an ointment container)cardboard (optional – if the form turns out to be too small, you can enlarge it by adding a layer of cardboard)
old fabrics
something to protect your work surface (for example, a piece of foil)
a knife
scissors
cling film
PVA glue
a brush
glitter (optional)
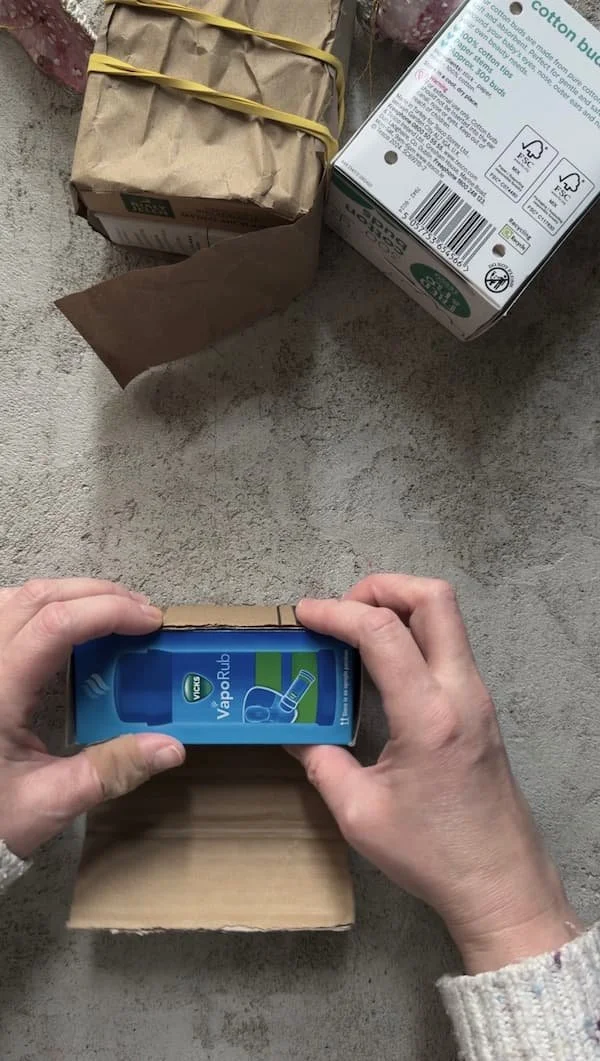
Step 1: Choosing the size and shaping the base form
At the very beginning, it’s important to decide what size of box you want to make. The dimensions will determine the form you’ll be working with.
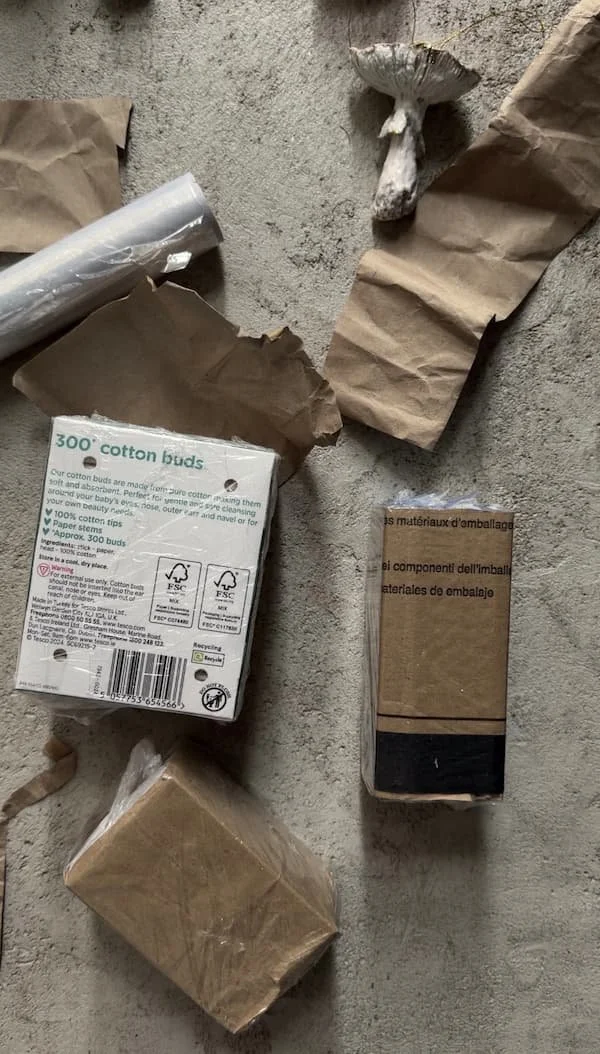
I started by looking around the house and using what I already had — bars of soap, a cotton bud box, and a warming ointment container. Everyday objects like these work really well as bases for shaping small boxes.
If you need a larger box, you can use books instead. Stack them together and wrap them in paper to create one solid block in the size you’re looking for.
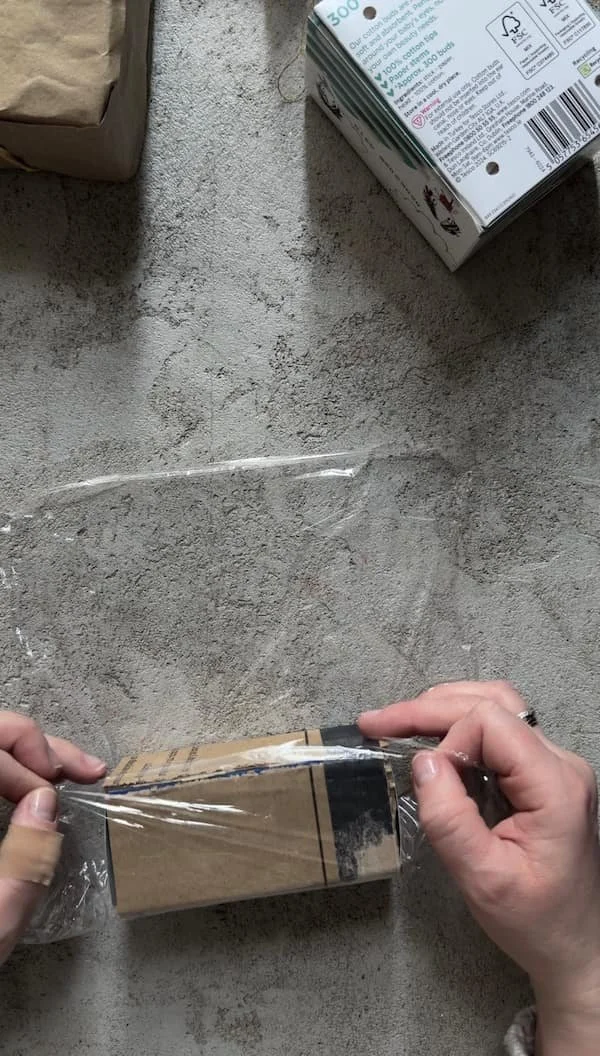
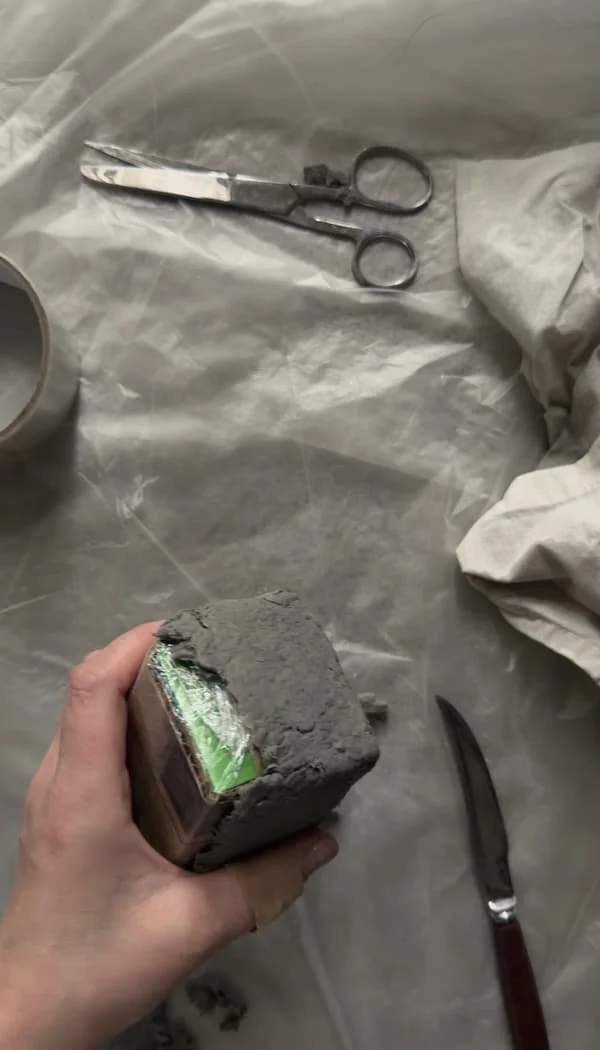
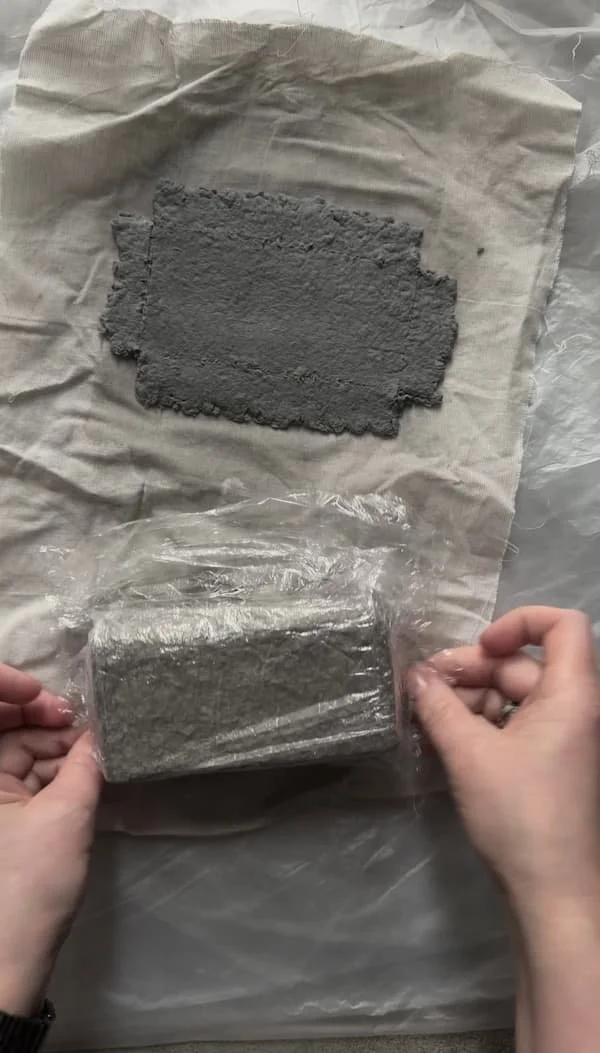
In my case, one of the boxes initially felt right in terms of dimensions, but after a moment I began to worry it might be a few millimetres too small. To adjust the size, I added a layer of old cardboard to the box, fixing the edges with tape. Once the shape felt right, I wrapped the whole form in cling film.
Wrapping the form in cling film is important — it protects the box from moisture and makes it much easier to remove the paper pulp box once it has dried.
Step 2: Rolling out the paper pulp and defining the edges
In the next step, we roll out the paper pulp. I usually use a piece of foil and an old fabric — preferably cotton or linen. Old kitchen towels or pieces of fabric from worn-out bedding work really well. It’s a good idea to protect your work surface from moisture, and the paper pulp is much easier to lift from fabric than from a smooth surface.
Roll out the pulp until the surface is large enough to cover three sides of the box. At this stage, it’s important to check which sides of the form will become the walls and which side will be the bottom. This helps ensure that the object you plan to place inside will actually fit.
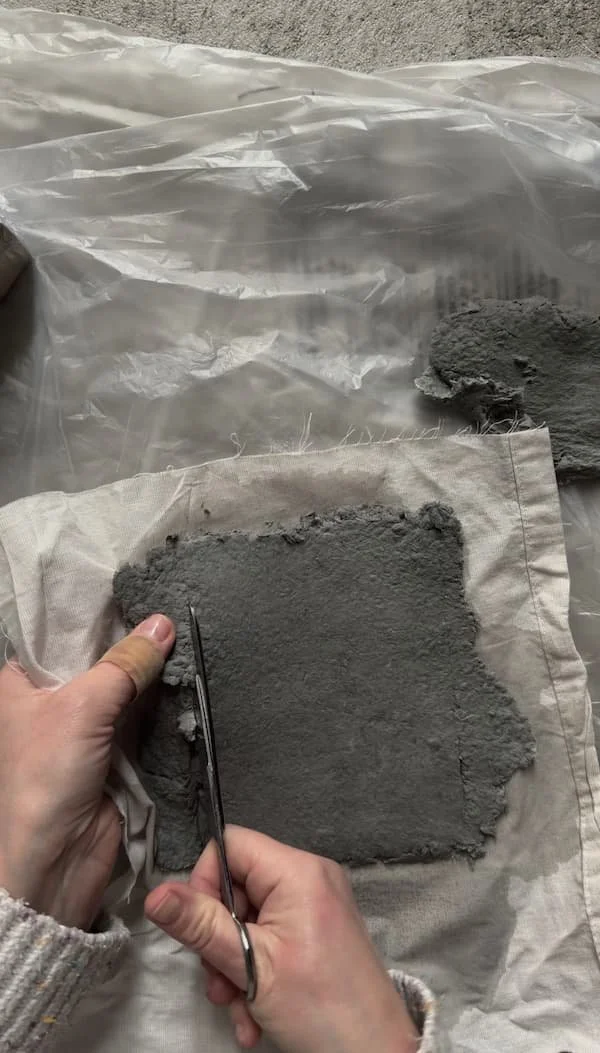
Next, use a knife to mark out the lines that will define the edges of the box. The edges of my box are intentionally uneven, inspired by the texture of handmade paper. To achieve this effect, I tore away the excess paper pulp and gently smoothed it, leaving a deliberately irregular finish.
The side edges, however, were cut using very sharp scissors. These edges will later be joined with the walls of the box, so it’s best if they are as clean and even as possible.
If you don’t have sharp scissors or if the rolled-out paper pulp is quite thick and difficult to cut neatly, there’s no need to worry. In that case, you can simply tear away the excess pulp as evenly as possible and then refine the edges with a knife. When working with paper pulp, imperfections are part of the process and often add character to the final form.
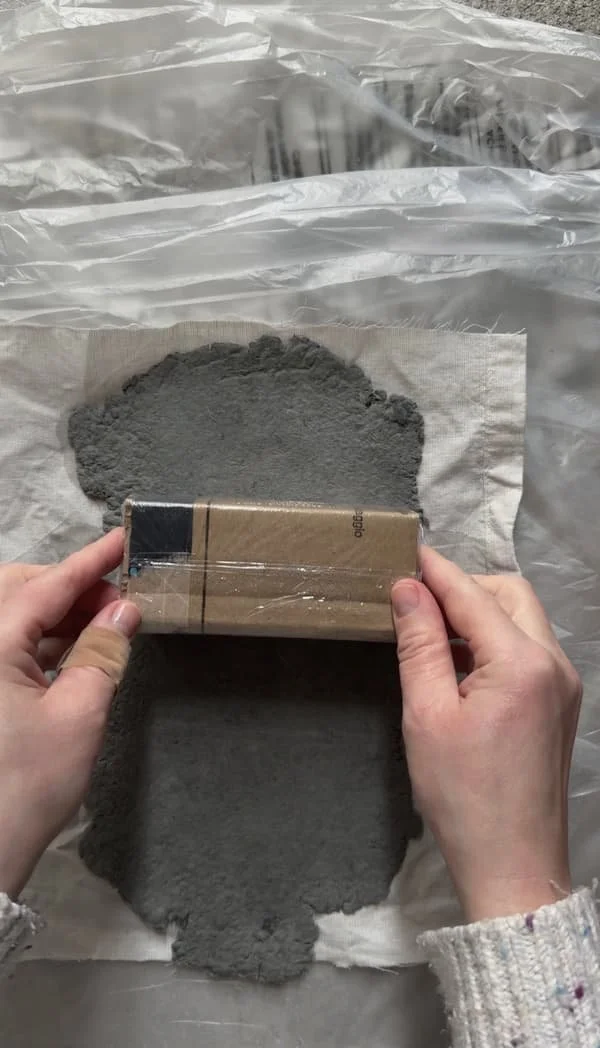
Step 3: Applying the paper pulp to the form
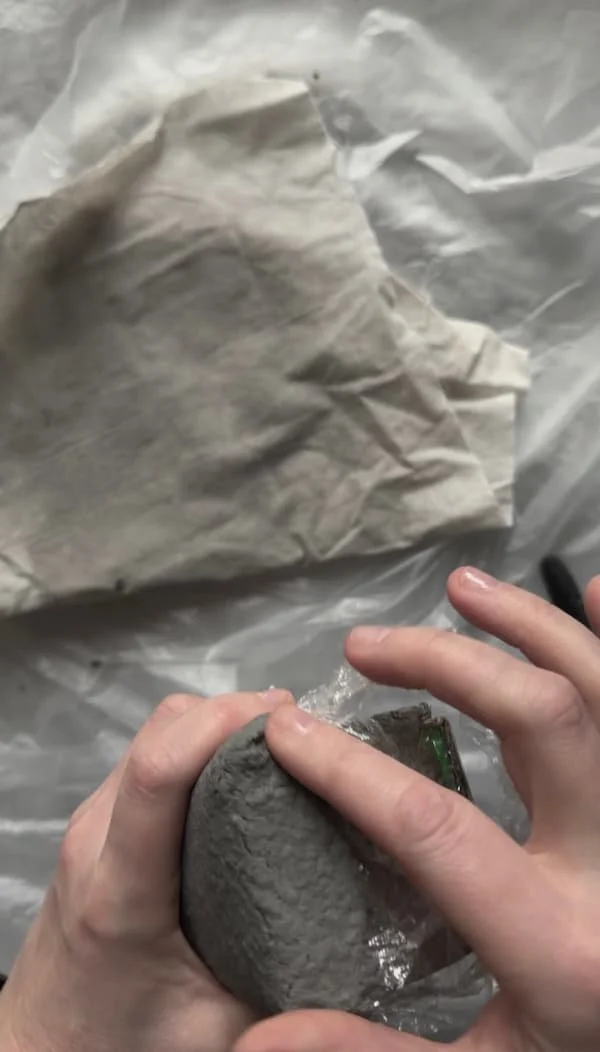
In the next step, place the shaped paper pulp onto your form together with the fabric. Gently press it down so that the pulp starts to take the shape of the form, then leave it for a short moment.
After that, carefully peel the fabric away, making sure the paper pulp stays in place on the form.
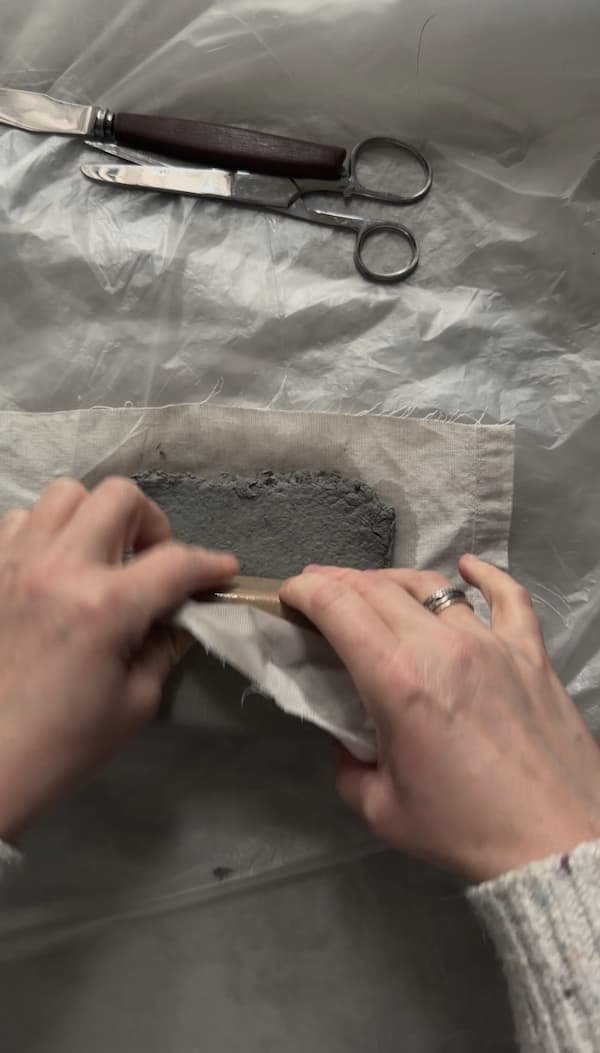

Step 4: Building up the shorter sides
In the next step, we need to build up the shorter sides of the box. You can use the rolled-out pieces of paper pulp that were torn off earlier.
Apply the pulp to the sides of the form and carefully align it with the edges of the already formed walls. It’s important that the joints are as neat and well connected as possible.
Use a knife with a smooth tip to gently press and smooth the pulp, helping the individual elements merge into one cohesive form.
Once the box is fully shaped, set it aside to dry. I placed mine near a radiator, which helped it dry faster. Make sure the box is left undisturbed until it is completely dry and firm.
Step 5: Making the lid
In the next step, we move on to making the lid.
Place cling film over the bottom of the fully dried box to protect it from moisture and to make the lid easier to remove later.
Next, shape the lid flat using paper pulp. Once the shape is ready, lift it together with the fabric and place it on top of the box, gently pressing it down so it fits the edges.
Join the edges together using PVA glue. If there are any gaps or areas where more material is needed, simply add a small amount of paper pulp and smooth the joins.
Leave the whole piece to dry until the lid becomes firm and fits the box securely.
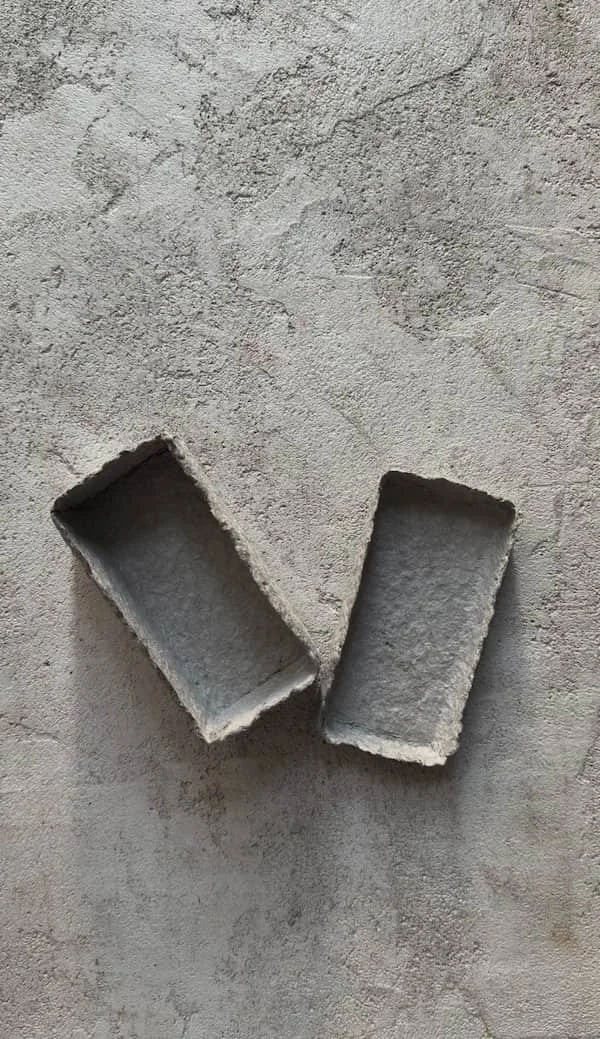
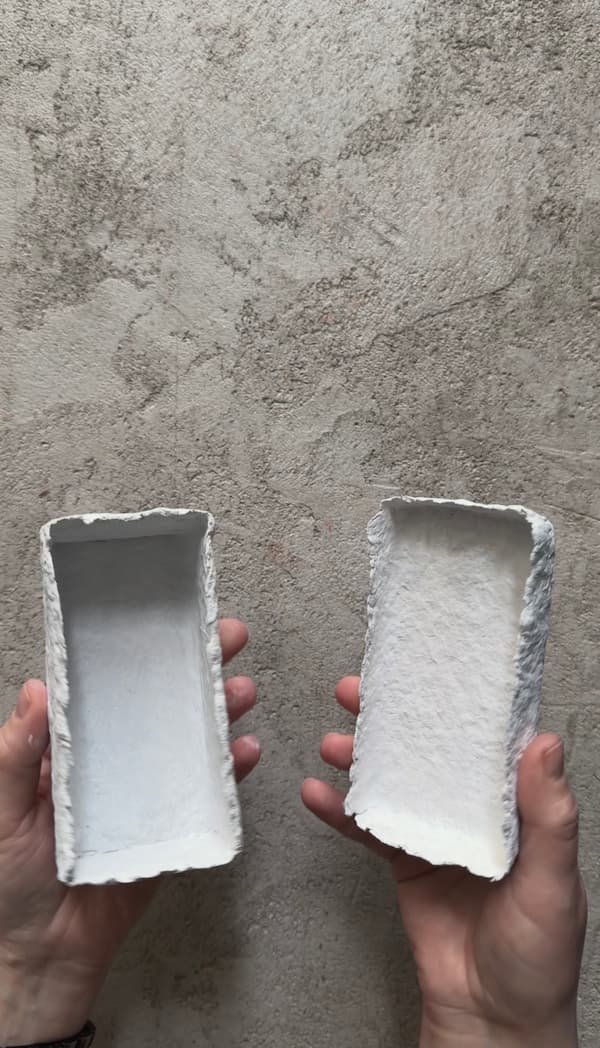
Step 6: Removing the box from the form
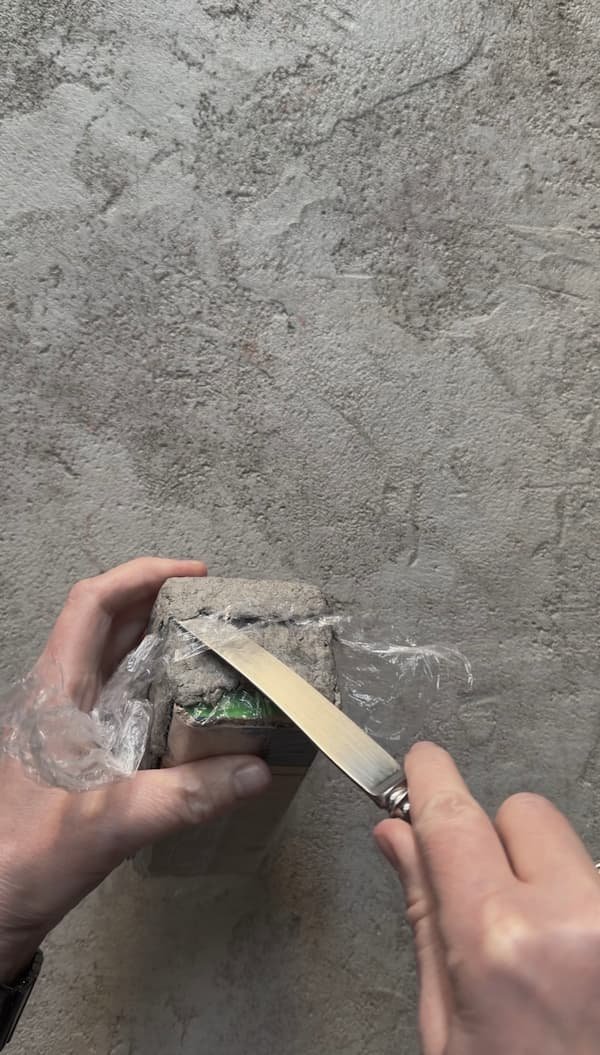
Once the box is completely dry, use a knife to gently lift and loosen the edges. This will help release the dried box from the form. Work slowly and carefully, gradually separating the paper pulp from the base. Thanks to the cling film, the box should come off easily without damage.

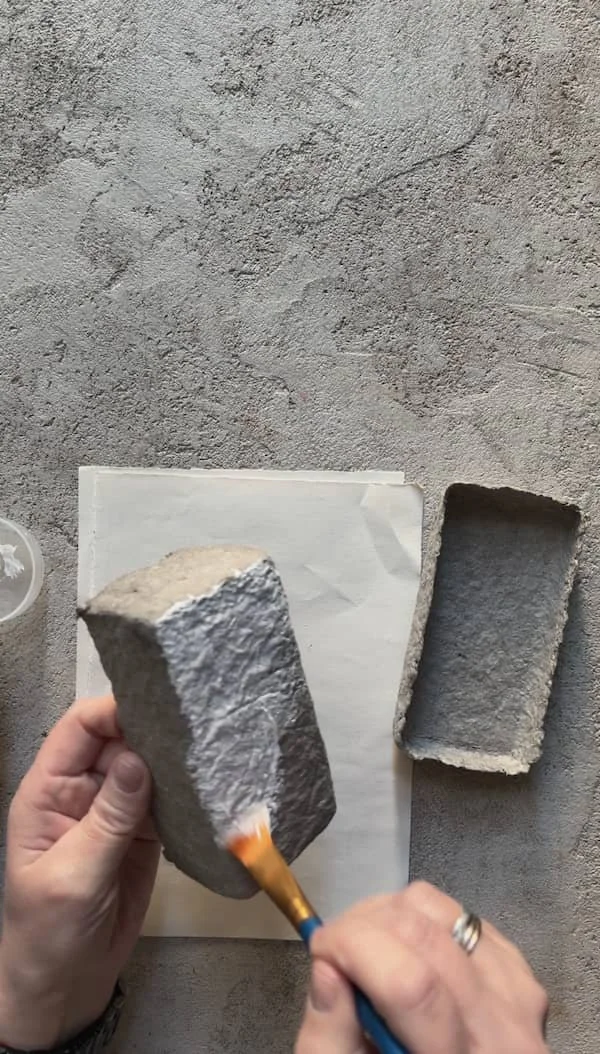
Step 7: Painting the box
In the next step, we move on to painting the box. Of course, this step is optional — the box can be left in its natural paper colour. It can also be black, orange, or any other colour. Everything depends on your own design and the effect you want to achieve.
I chose white, as I plan to keep the entire series in this colour. I used a simple white matte acrylic paint. To achieve full coverage, I applied three coats. It’s worth noting that paper tends to absorb paint, so the first layer may soak in almost completely.
Once painted, leave the box to dry fully.
Step 8: Decorating the box
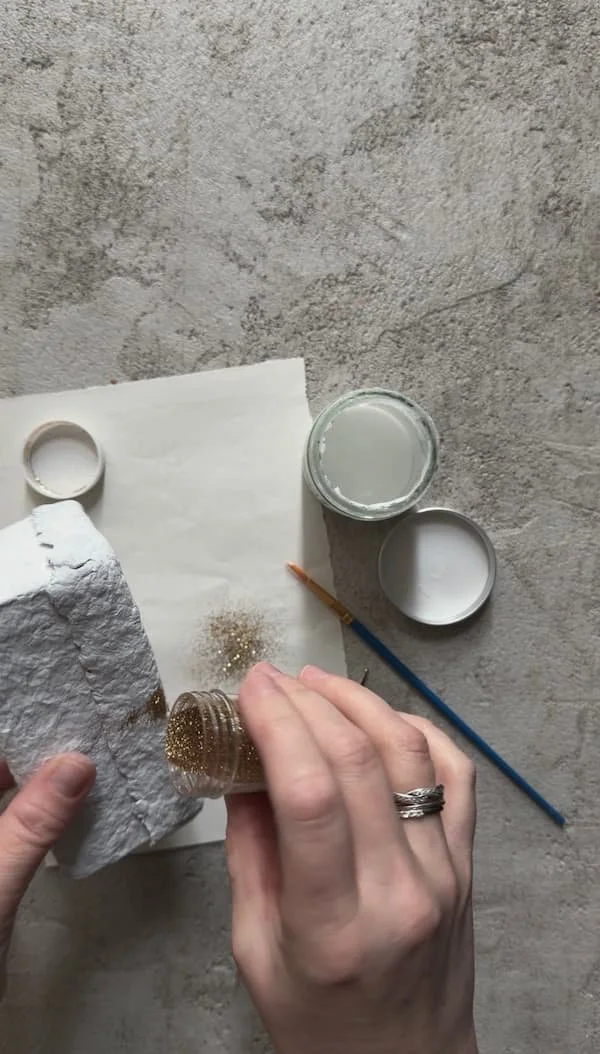
The final step is decorating the box. I decided to add a touch of glitter — since these are Christmas gift boxes, a subtle shimmer felt like a natural choice.
To achieve this effect, I applied PVA glue to selected areas and sprinkled glitter over it. Once everything had dried, I gently brushed away the excess glitter using a soft brush.