From Pomegranate to Form
Stepping Outside My Comfort Zone (Again)
Sometimes it’s not about planning. Sometimes it’s just about… trying something different.
This project was exactly that – another step outside my comfort zone.
I’ve already shared how to make a black version of my paper pulp coaster, a more graphic and minimal take. But this time, I wanted to go a little further. And somehow, the shape started whispering: pomegranate.
The Shape Reminded Me of Something
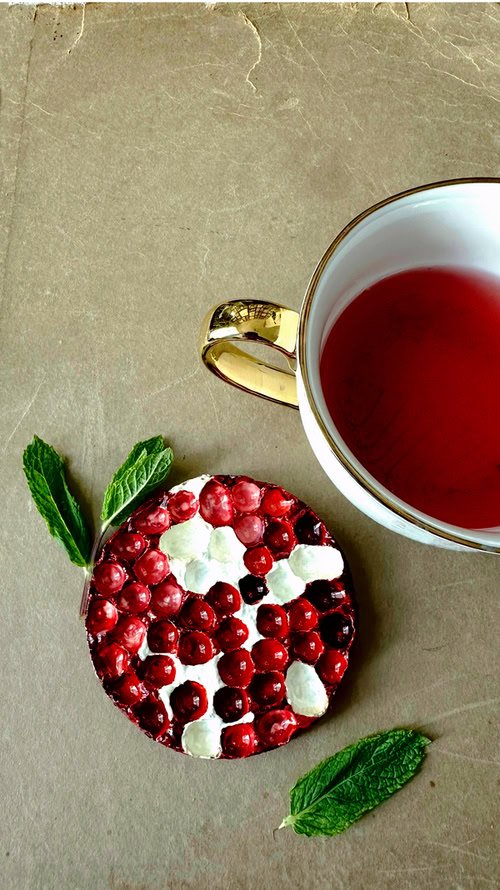
Before the final version came to life, I kept staring at the shape, trying to figure out what it reminded me of. Those repeating indentations, the organic irregularity… and then it hit me – a pomegranate! And just like in the fruit itself, the structure turned out to be perfect for playing with colour, texture, and… light.
Drawer Paints & Accidental Glass
This project is also a story about things that have been lying around in my drawer forever. Anyone who’s into crafting knows the feeling – you see something odd in an art store, absolutely don’t need it, but for some mysterious reason, you have to buy it. In my case? Glass paints.
I’ve never even been interested in glass. I have no idea why I bought them in the first place. After two failed attempts, they were abandoned and forgotten – saved for a rainy day.
Well, this was that rainy day.
I didn’t have a deep red acrylic or gouache at hand, so I reached for the glass paints… and surprisingly, it worked. On the test piece, the effect was lovely – glossy, almost porcelain-like. Exactly the kind of shine I didn’t know I was looking for.
Painting With Gravity
I’ll admit – painting these forms with glass paint is no joke. It’s watery, it sinks to the bottom of every indentation. But what first seemed like a problem actually turned into a strength.
By layering the paint and tilting the piece at different angles while it dries, you can get this beautiful depth of colour and a glassy finish that honestly looks like ceramic glaze.
If you’d like to create this coaster from scratch, I’ve shared the full step-by-step tutorial in a previous post – click here to see it.
You can see a short video of the whole process in the clip below.

Step 1 – Apply a Light Base
Start by covering your dried paper pulp form with a light base coat. I used regular acrylic paint, but paints for wood are actually especially great here – after all, paper is wood in disguise.
This layer helps unify the surface, evens out tones, and gives you a clean background for the colours you’ll apply later.


Step 2 – Paint the Edges and Underside
Next, paint the edges and bottom of your coaster using shades of red, burgundy, or anything in between. I went all in – I somehow ended up with almost the entire glass paint palette :P, so I had plenty of options to play with.
This step gives the piece a rich, juicy look and makes the whole thing feel more finished – even from below. It also sets the stage for the "pomegranate skin" vibe.

Step 3 – Painting the “Seeds”
This part was a bit of a mix – some testing, some happy accidents, and some problem-solving.
At first, I tried applying the red glass paint directly onto the base coat… but the colour turned out way too dark. Not quite the juicy red I was going for.
So I covered the entire surface with a layer of white glass paint first. Once that dried, I started layering different shades of red and added a touch of yellowish-ivory (also glass paint) to recreate the inside of a pomegranate – which often has warm tones of ecru or ivory between the seeds.
The result? A glossy, multi-tonal surface with a depth that feels organic and richly textured.
